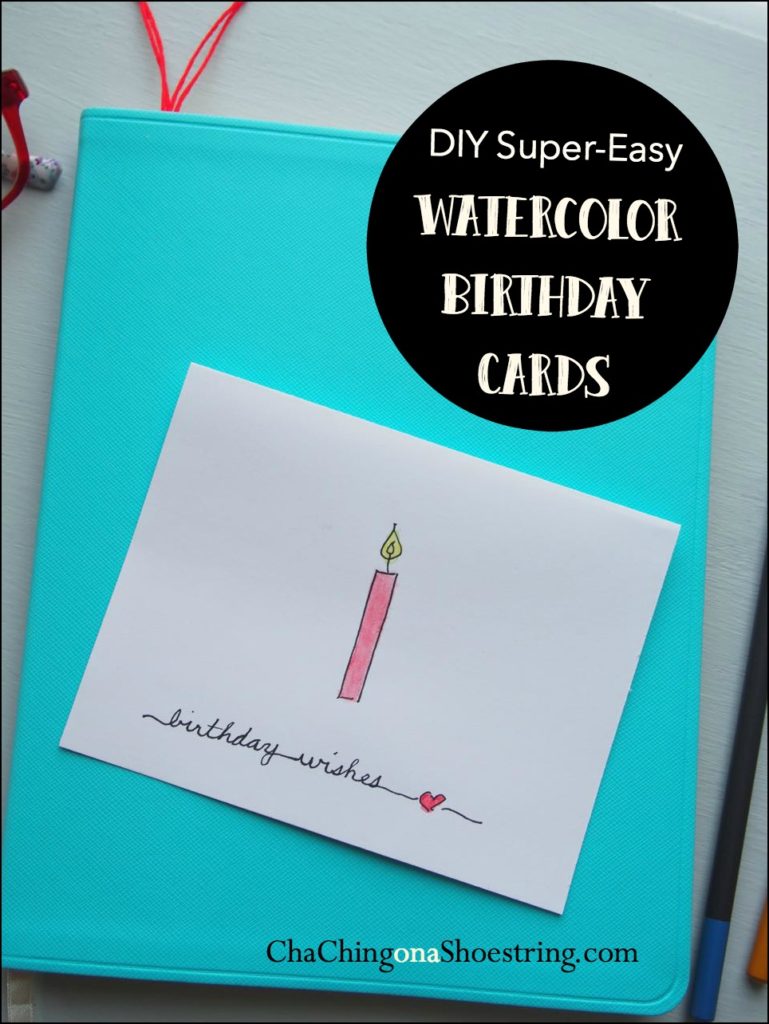
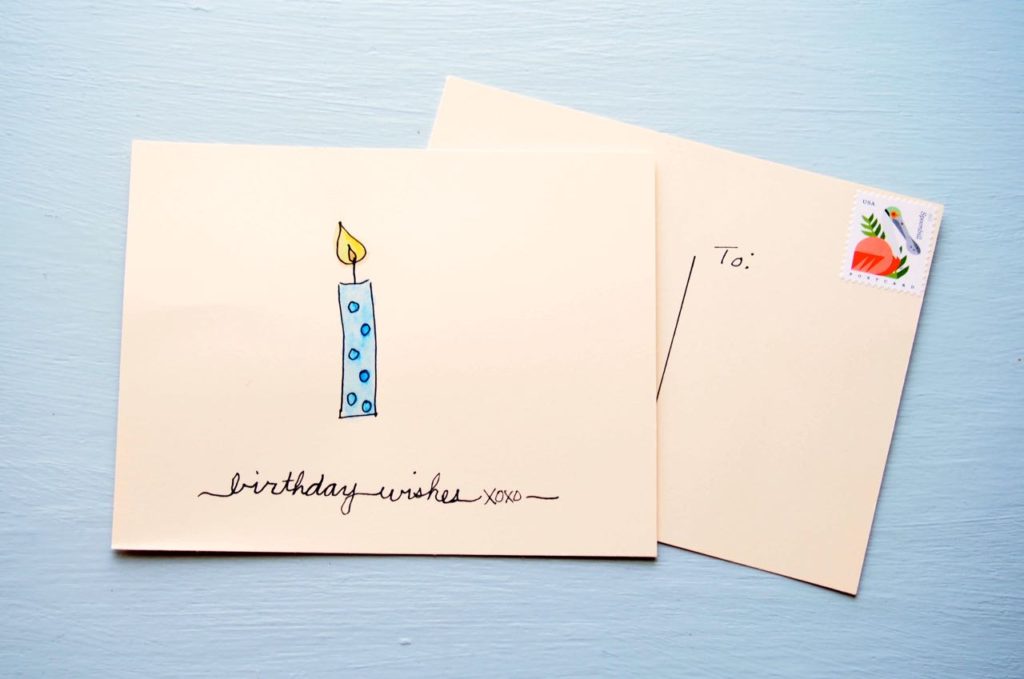
One of the disappointments of my life is that I can’t draw. I used to dread art class in high school because what came so easily to others was sweat and tears for me. Thanks to Pinterest, however, I have recently learned that I actually can “draw”. If you don’t believe me, look at the birthday cards I “drew”! Cute as anything, aren’t they?
Oh, I love the simplicity of this card. And it’s whimsical, so there’s no pressure for perfection.
Knowing that I can make cards like this is especially exciting to me; you see, I have six children, plus their six spouses, along with 18 priceless grandchildren. And it is my pleasure to send birthday cards to all 30 of them.
Supplies Needed:
—Cardstock. I always have a supply of both white and off-white sheets of cardstock on hand
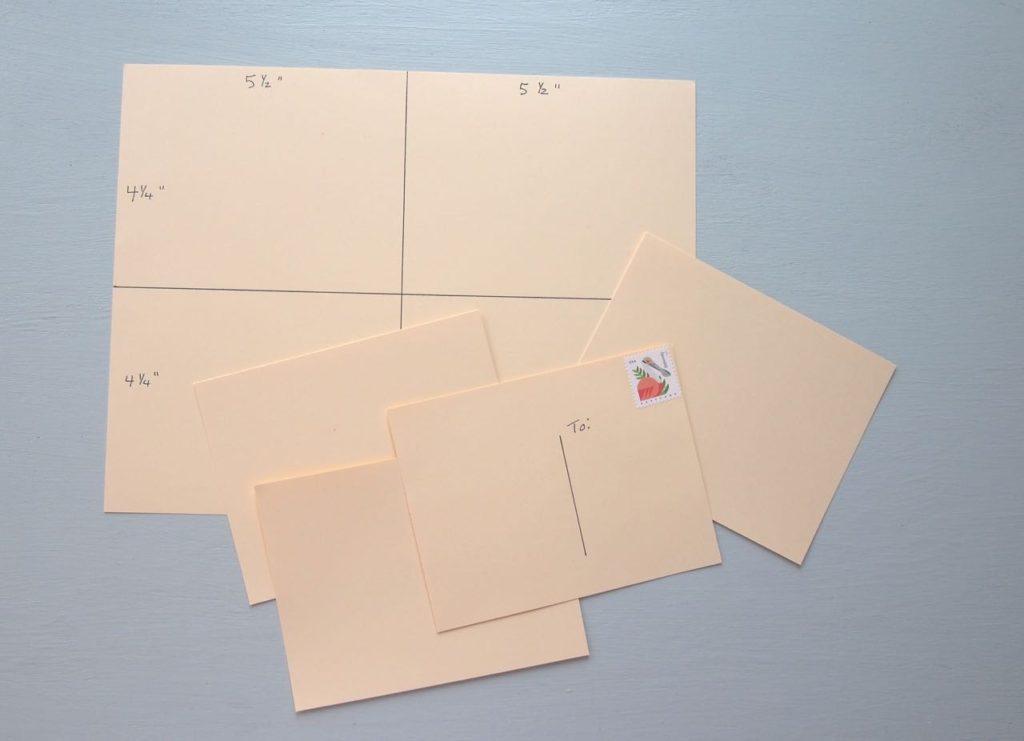
—Envelopes. I always keep an eye out for envelopes on sale or at garage sales or thrift stores. Currently I have a supply of both white and off-white A2 size [4 1/4″ x 5 1/2″] envelopes on hand–just the right size for 8 1/2 x 11″ card stock. [If you are using a different size envelope, just adapt the card measurements.]
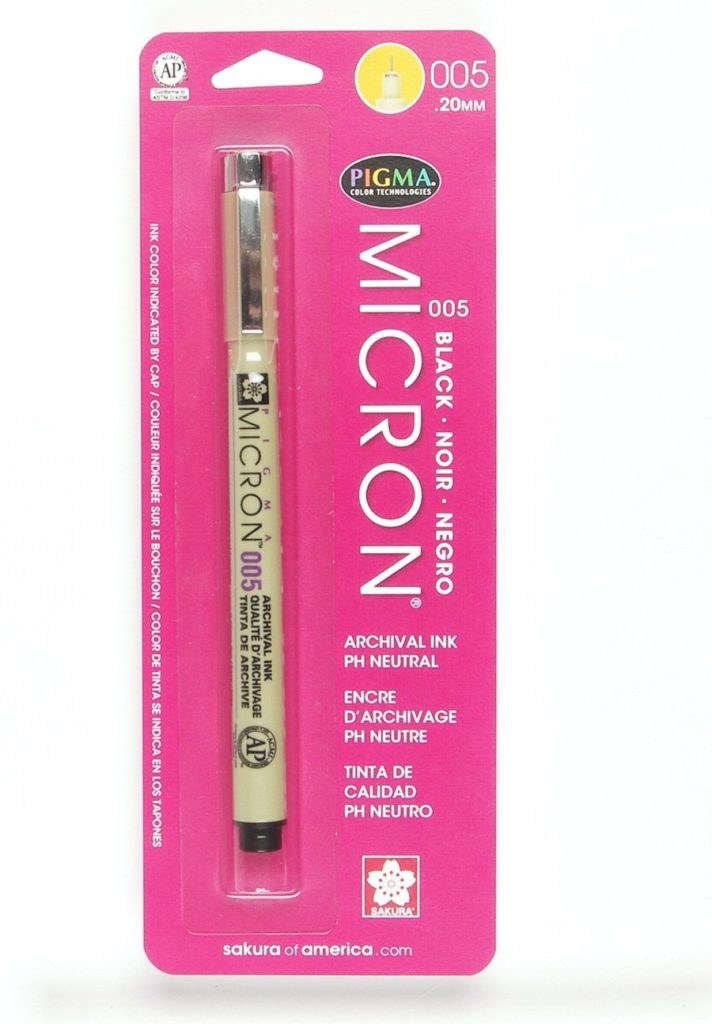
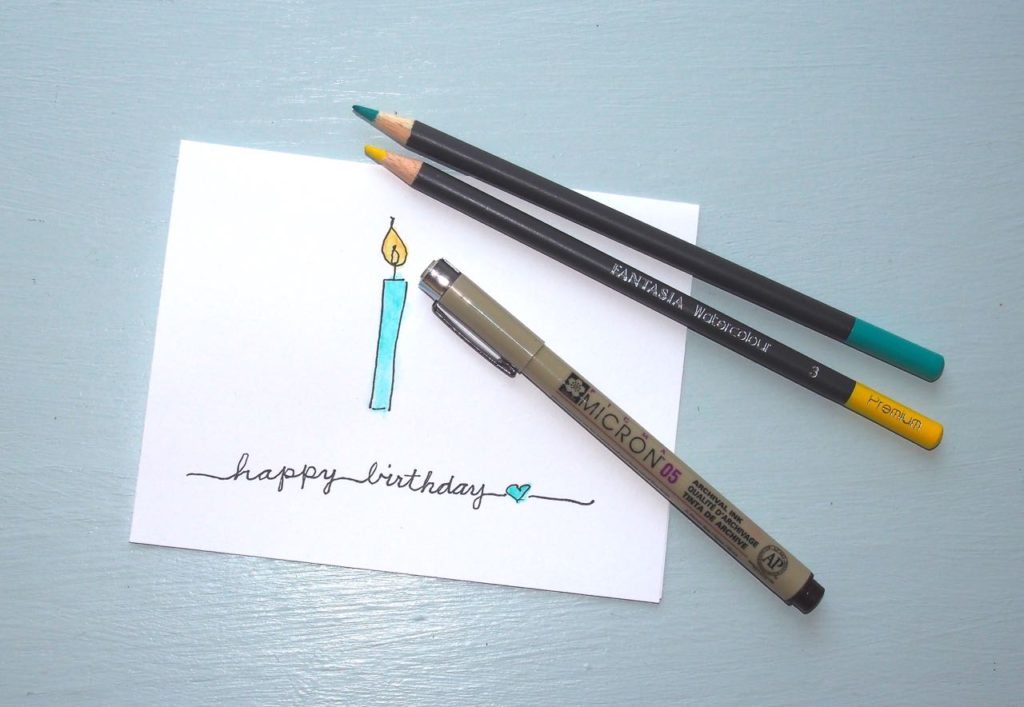
—Pen. Since their ink is waterproof, my personal preference is Sakura Pigma Micron 05 pens for drawing the candle and writing the text.
 –Watercolor Pencils. Instead of watercolors, I use watercolor pencils. When I discovered these Fantasia Watercolour Pencils [half price at Michaels], I had no idea the pleasure they would bring me.

So here we go. A card can actually be made in minutes once the supplies are assembled. And once you get going, it’s so much fun you don’t want to stop.
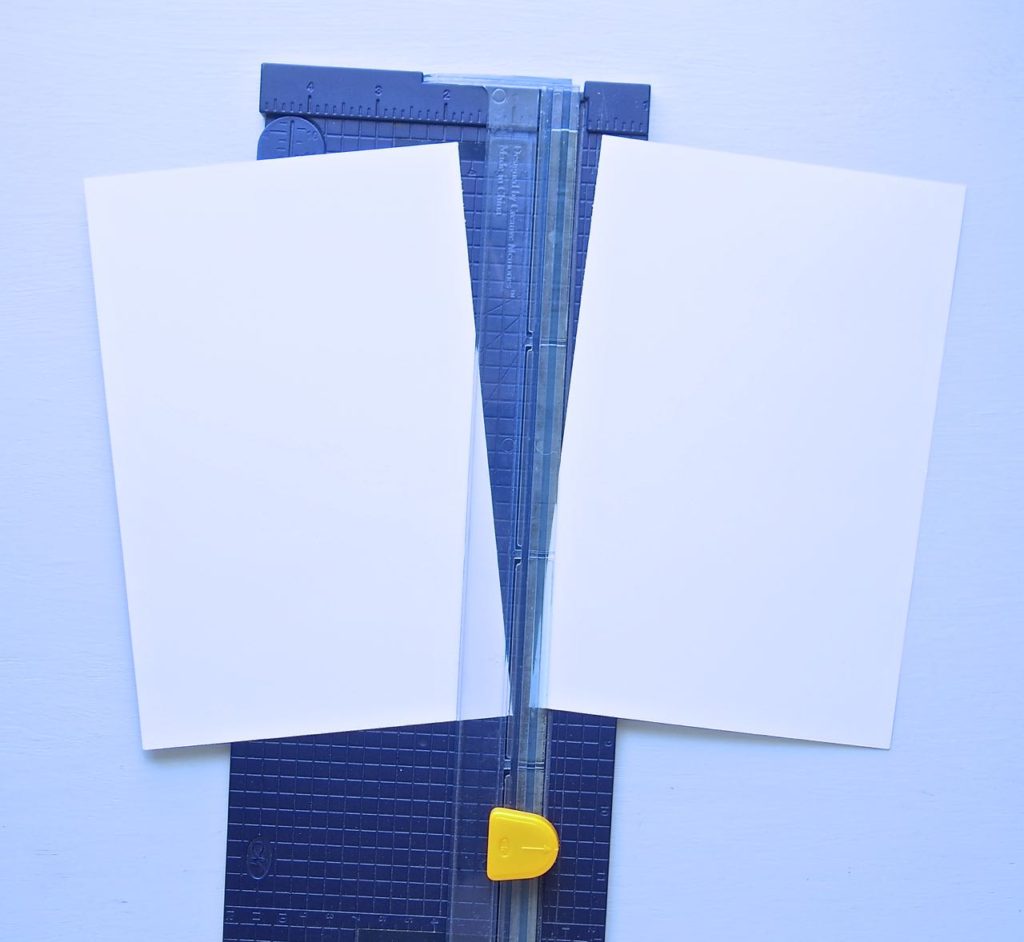
#1
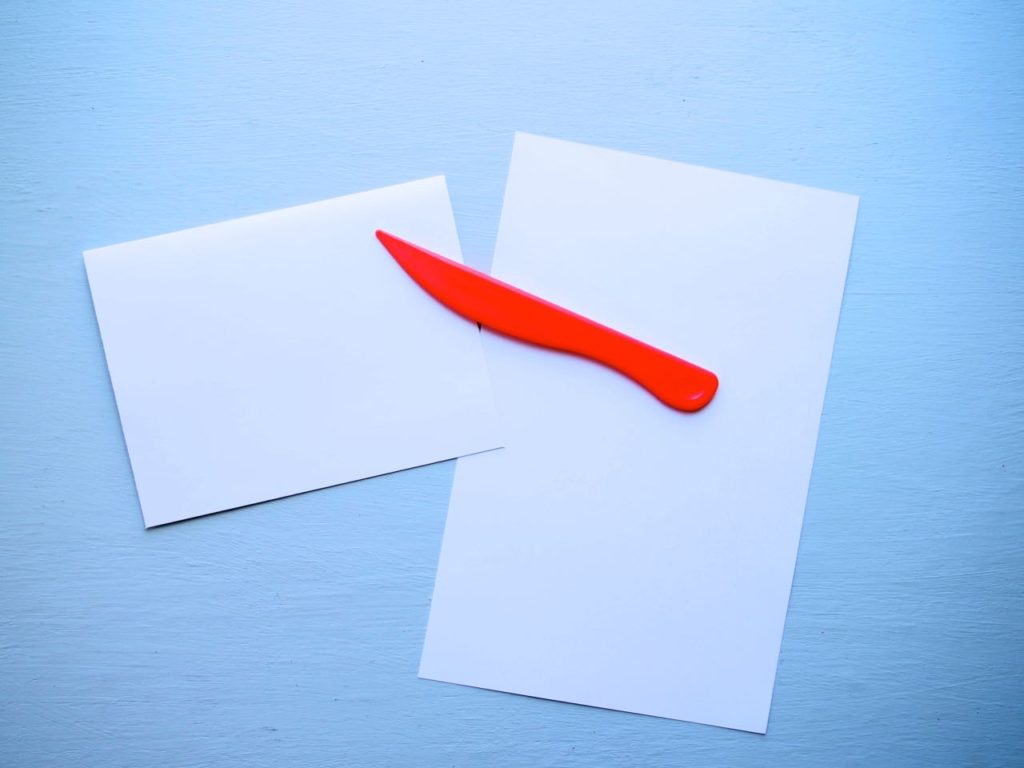
Cut a sheet of cardstock in half on the 11″ side.
#2
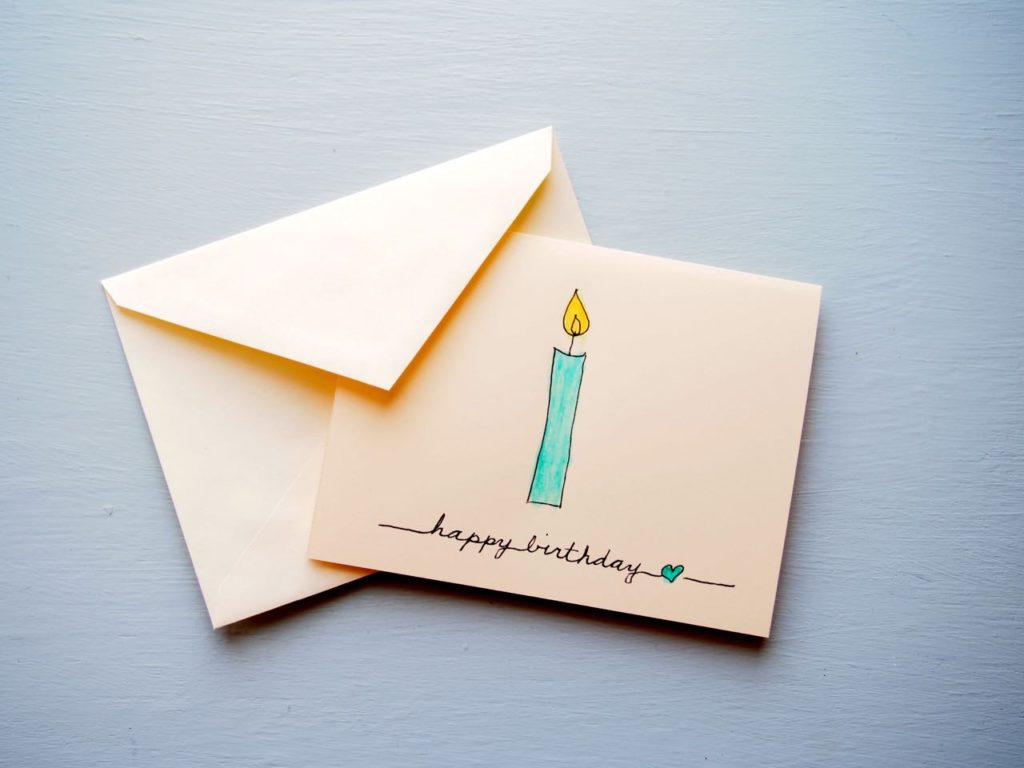
Fold the two sheets in half, creating two cards 5 1/2″ x 41/4″. Then press firmly with a bone folder, a ruler, or a dull butter knife to flatten the folded edge.
#3
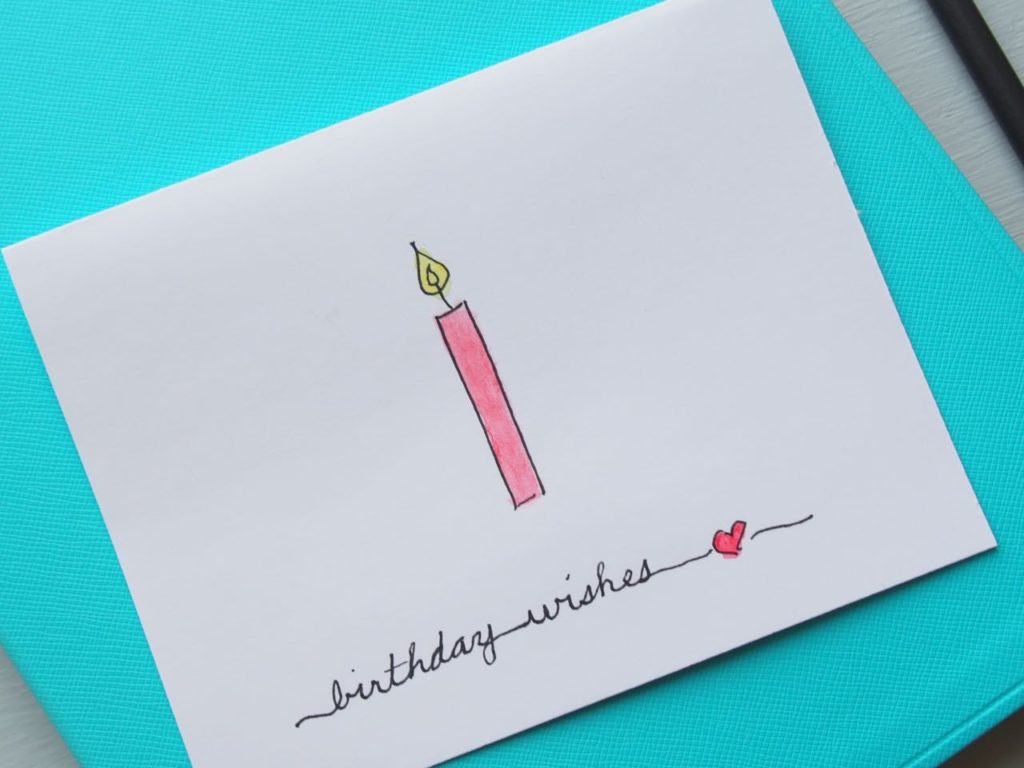
Draw the outline of the candle and flame with the pen, and write the birthday message. No fancy lettering required. Remember, whimsy doesn’t require perfection.
#4
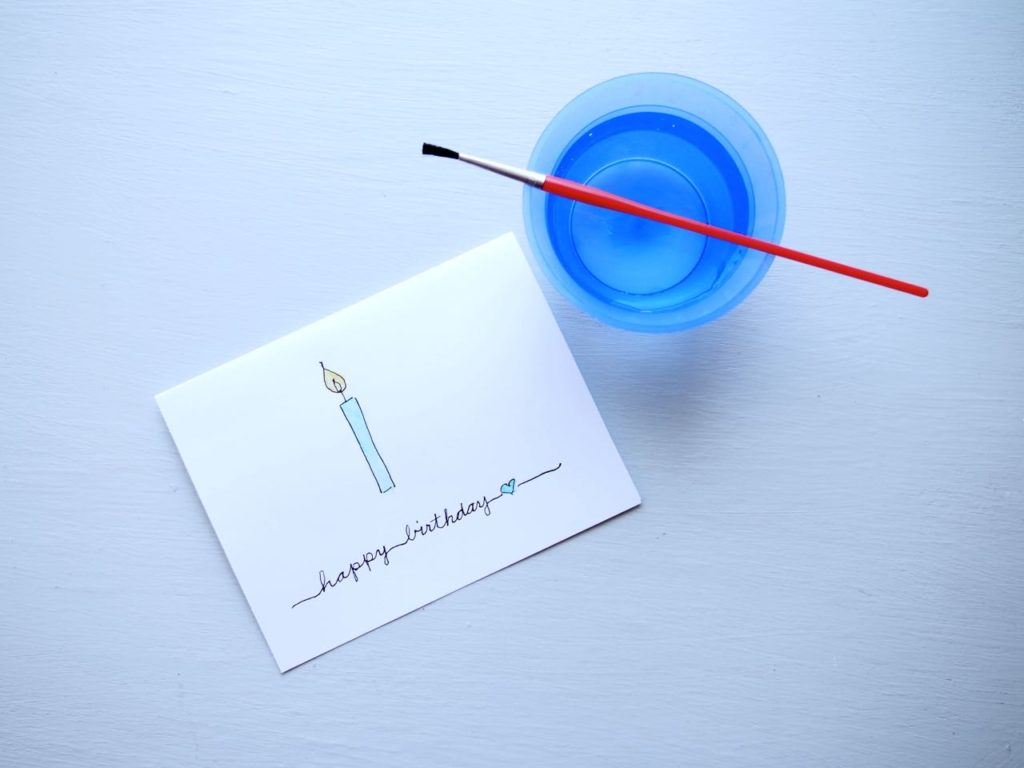
Color in the flame and candle with the watercolor pencils, then brush lightly with water.
And that’s it!
#5
How about some postcards?
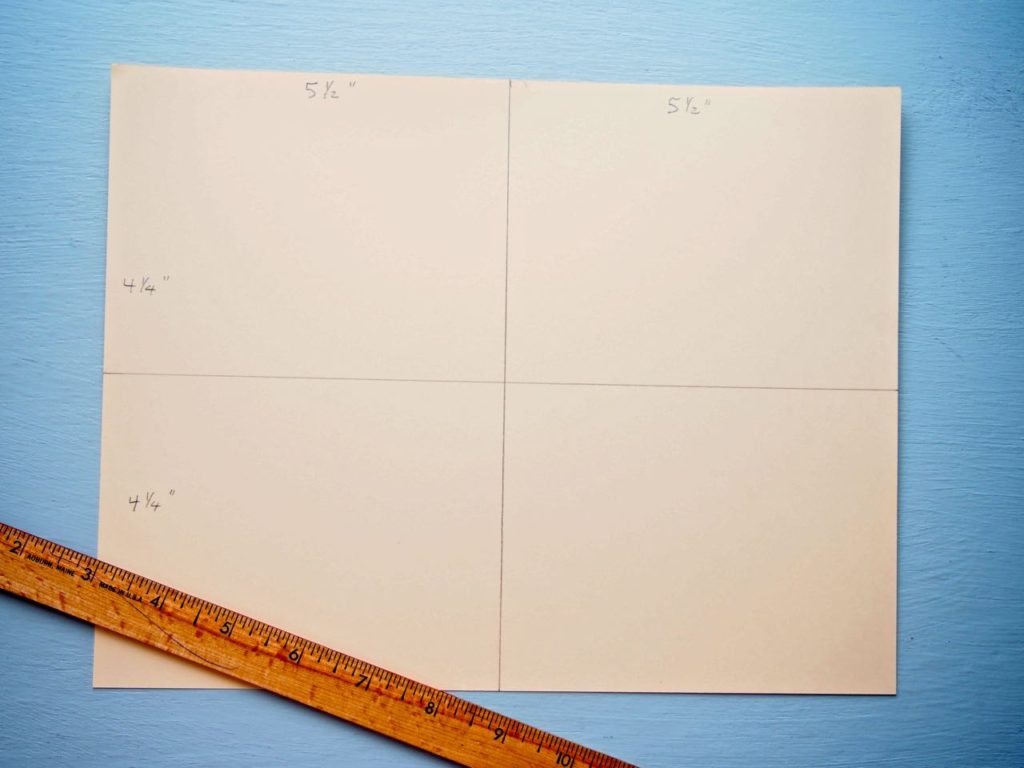
Postcards are another money-saver with just as much pleasure for the recipient. One sheet of cardstock creates four cards–good deal, huh? And there’s still a space to write a lovely Happy Birthday note.
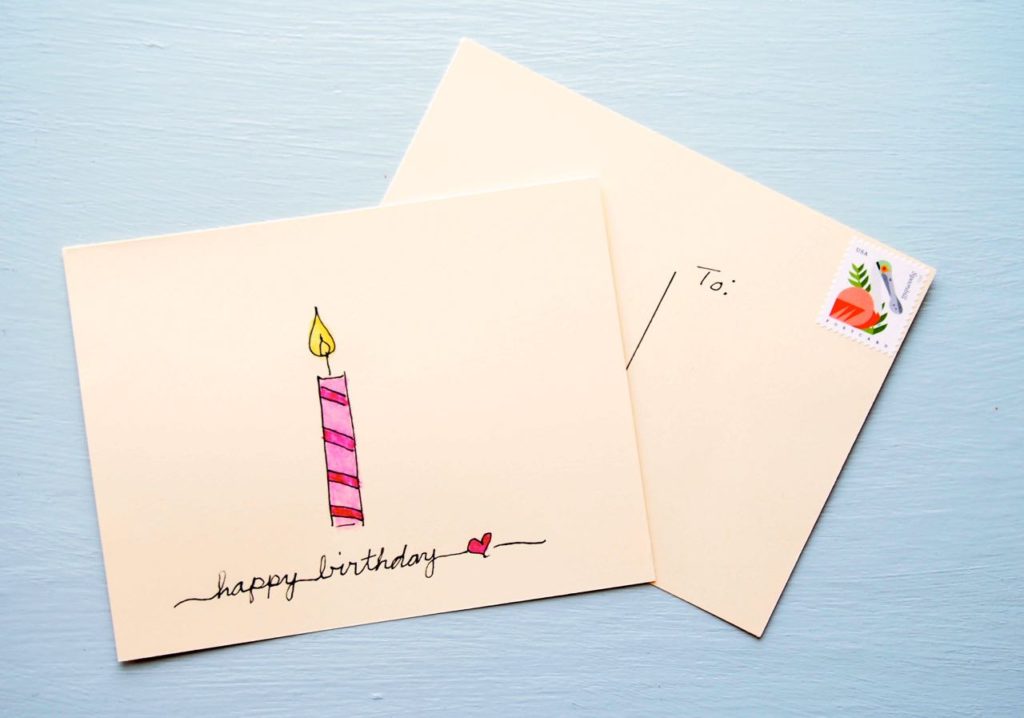
So there you have it! Ever so easy and fun with a personalized love note written inside.
***