Cha-Ching on a Shoestring™

Living Large on a Limited Budget

  • STORES
    • Coupon Database
    • CVS
    • Rite Aid
    • Walgreens
    • Target
    • Walmart
  • Restaurants
  • Online Deals
    • Amazon Deals
    • Amazon Subscribe & Save Deals
  • Freebies
    • Free Kindle Books
    • Free Stuff by Mail
    • Free Birthday Stuff
    • Free Stuff Online

The #1 Way I Save Money on Christmas

July 31st, 2015 By Kaley
This post may contain affiliate links, which means I will make a small commission if you click and make a purchase.

How to Save Money on Christmas

I realize it may feel rather early to be talking about Christmas.

But let’s be honest, it’s never too early to talk about saving money on your Christmas shopping, is it? It’s those who plan ahead who don’t find themselves with buyer’s remorse after the frenzy of the holiday season. (Learned that lesson the hard way!)

As I think about it, I may have titled this post incorrectly. Rather than “The #1 Way I Save Money ON Christmas”, I likely should have named it “The #1 Way I Save Money FOR Christmas”.

If I go with the first title, my answer would simply be “Buy less”.  It’s that easy.

But I also really enjoy gift-giving at Christmas time – like most people I know. So it’s also important to save money FOR Christmas.

Many people set up a Christmas fund in their bank account and set aside a little each month to lessen the impact on their budget.

The Christmas after our year and half bout of unemployment, I created a strategy which actually found money outside of my bank account so that spending had NO impact on our budget.  (That is also the Christmas that I spent only $50 out of pocket, which took a whole lot of planning and strategizing. You can read more about that here. )

But for those of you don’t have hours upon hours to strategize your Christmas saving and want to know which is my all-time, hands down favorite method, here you go:

The number one way I save money on Christmas is by using Swagbucks.

(For those of you who have been around for long, this likely does not surprise you!)

Through the years, Swagbucks has saved me hundreds and hundreds of dollars on Christmas. By saving up my Amazon gift cards and other rewards throughout the year, I’ve been able to chop my Christmas budget in half or more – and STILL be as generous as I’d like to be.

If you are new around here and aren’t familiar with Swagbucks, it is a rewards site where you earn points (called SB) for things you’re probably doing online already, like searching, watching videos, discovering deals, and taking surveys. Then you take those points and exchange them for gift cards to places like Amazon, Starbucks, Walmart, Target, or PayPal cash. You can earn gift cards with as little as 300 SB.

It’s quite simple to earn $25 or more in Amazon gift cards each month using Swagbucks – which over the course of a year really adds up!

Exclusive Signup Code:

If you haven’t joined Swagbucks yet, NOW is the best time. Swagbucks has generously offered my readers an exclusive signup code that will score you 70 FREE points called SB just for signing up. Simply click HERE to sign up now and enter my code CHACHING70 to start off with 70 FREE SB (in addition to the 4 you’ll automatically receive)! Just click on the words “I have a sign up code” upon signing up.

You can also earn up to 75 more free SB by completing the quick tasks recommended once you register, which will get you halfway to your first Amazon gift card!

Click here to start your Christmas saving now!

Once you’ve signed up, you’ll want to click here to find out the top 5 easiest ways to earn SB and start saving up FOR Christmas now!

Merry-Little-Christmas-Project-335x500 6

Want more help simplifying Christmas? Join me and thousands of others as we transform Christmas with five little words. 

How to Save Money for Christmas

Filed Under: Merry Little Living, Saving money

Delicious (and Easy!) Roasted Broccoli Recipe that Your Kids Will Beg For

July 29th, 2015 By Kaley
This post may contain affiliate links, which means I will make a small commission if you click and make a purchase.

Delicious Roasted Broccoli Recipe with Garlic and Lemon

By nature, I am a dreamer. My list of “Lofty Dreams for my Future” includes such “shoot-for-the-stars” unattainable goals as:

  • Become independently wealthy and travel the world on my own private jet.
  • Invent something that will bring about world peace.
  • Find a way to get my kids to eat broccoli.

I know. I know. That last one is pretty crazy, right?

That’s what I thought too.

And then my Dreams came true. (Well…at least one of my dreams.)

My kids now beg for broccoli. 

I don’t know how it took 30 mumble-mumble years for me to realize that broccoli does not have to be served bland and limp. I had fallen victim to the lie at some point in my life that fixing a dish of broccoli meant boiling it to the point of removing any flavor, but with a dash of salt and pepper to “spice things up”. Every once in a while, when I was feeling generous, I’d throw a slice of American cheese on top to disguise the fact that I was trying to get my kids to eat my lawn…er…their veggies.

And then one day, I decided to throw caution to the wind and follow an actual Broccoli Recipe, motivated by my friend Heidi’s suggestion of this recipe. I’ll admit – I was a skeptic. Broccoli was bland and limp. I was confident that there was no hope for broccoli.

I am now a believer.

There’s no turning back now, folks. The minute my kids started stealing broccoli from my plate and my husband told me that he could just eat this for dinner, I knew my life was changed forever.

Roasted Broccoli with Lemon and Garlic Recipe

Here’s the recipe that will change your life too:

Roasted Broccoli Recipe with Lemon and Garlic

(adapted from The Amateur Gourmet)

Ingredients: 

2 large bunches of broccoli

6 Tbsp Olive oil

1 1/2 tsp salt

1/2 tsp fresh ground pepper

4 Garlic cloves

1 Lemon

1/3 cup freshly grated Parmesan cheese

Recipe:

1. Preheat the oven to 425.

2. Cut broccoli into florets (they will shrink, so don’t cut them too small.) If you choose to wash your broccoli, be sure to dry it thoroughly.

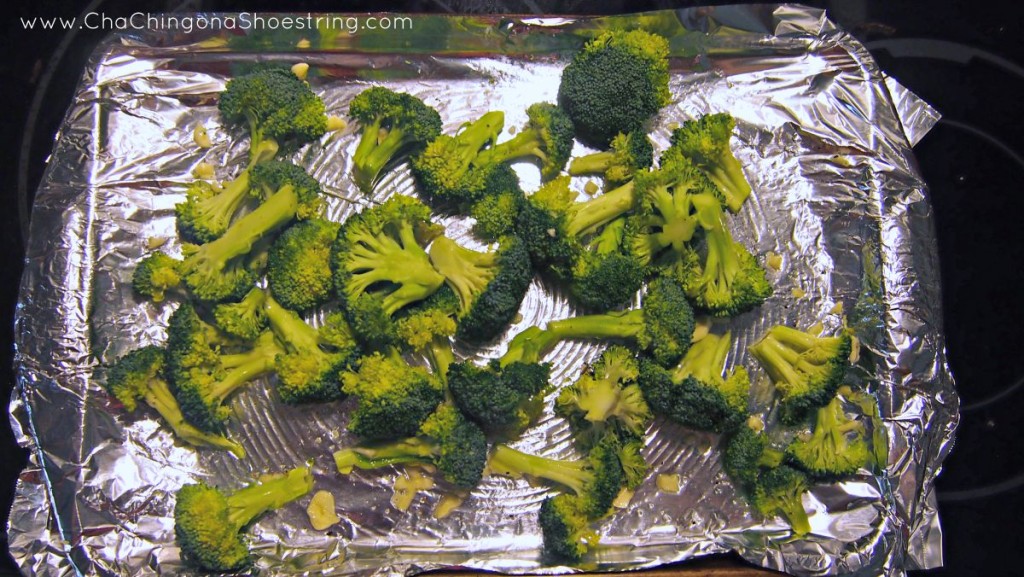
3. Line a cookie sheet with aluminum foil and place the broccoli on it – making sure to space it out evenly. Toss with about 5 Tbsp olive oil, salt and pepper.

4. Toss in 4 garlic cloves that are peeled and sliced. (You can also opt to grate your garlic over the broccoli.)

5. Roast in the oven 20 to 25 minutes. The tips of some of the florets will be browned when it is done.

6. After taking the broccoli out of the oven, zest a lemon over it, then squeeze the lemon juice over the broccoli. You can also add 1.5 Tbs more olive oil (although I often forget to do this) and then top it off with the freshly grated Parmesan cheese.

Roasted Broccoli Recipe

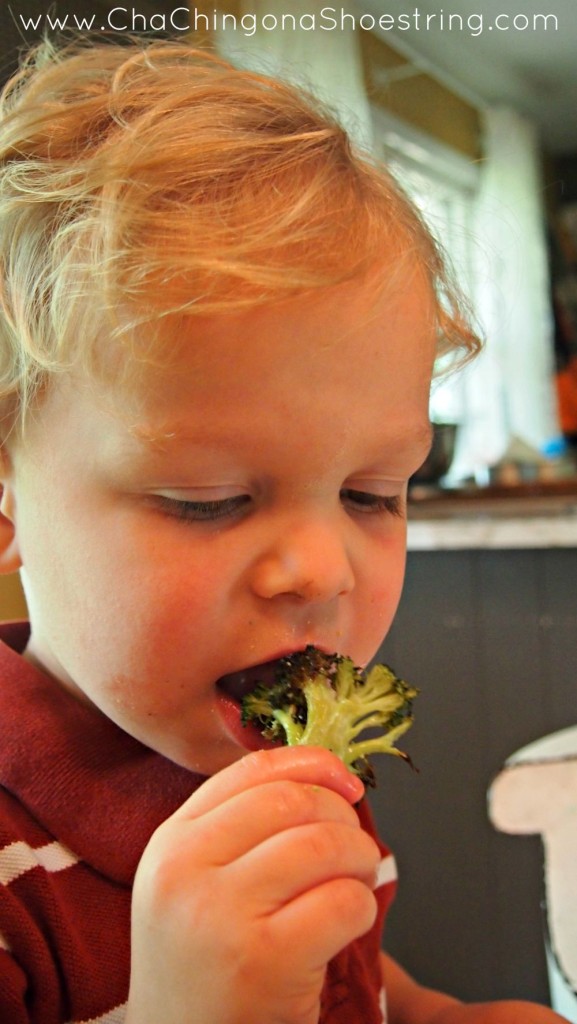
This precious little floret was stolen from my plate. This delights me.

The Merry Little Living Project

Check out more posts in my Merry Little Living series. 

Filed Under: Merry Little Living, Recipes, Simple Living Tagged With: noads

My Monthly Missions Update for June {Jam Sessions and Chore Systems and More}

July 7th, 2015 By Kaley
This post may contain affiliate links, which means I will make a small commission if you click and make a purchase.

My Monthly Missions

Tonight, my husband and my three boys and I stood very still and very quiet for what felt like a very long time.

It was definitely the stillest and quietest I’ve seen my three boys in – I think – ever.

In case you are wondering – we were deer watching. A mama and her baby were hanging out in the field behind our house and we were soaking it up. Maybe we will get a deer feeder to attract them over more often so we can get a few pictures of them! My friend told me that they got a deer feeder after doing some research at feedthatgame.com.

Such a simple pleasure, but the beauty of the evening and the joy of observing these creatures so closely as a family and the fun of hearing my three year old whisper, “She’s beautiful,” made it a moment to remember.

It’s just another reminder of why I started this thing called The Merry Little Living Project – to pursue this simple, joyful life.

Monthly Missions Update:

This past month, I asked myself four questions – the same four questions I’ve been asking every month this year:

  • What is one way I can simplify life this month?
  • What is one way I can practice a healthy habit this month?
  • What is one way I can organize life this month?
  • What is one way I can bring joy to life this month?

Here’s what I came up with:

How I simplified life:

Chore System for Kids

I re-instated our Summer Chore System. I kind of love it. While this was not the simplifying mission I intended to accomplish this month, I can’t think of a much better way to simplify life this summer.

How I practiced a healthy habit:

I continued running, which I can honestly say is something I enjoy in the summertime. My next 5K is tomorrow evening, so wish me luck and speedy feet! I set a goal this year to run three 5K’s this summer, so I’ll be signing up for another sometime soon!

How I organized life:

Easy DIY Patriotic Luminaries

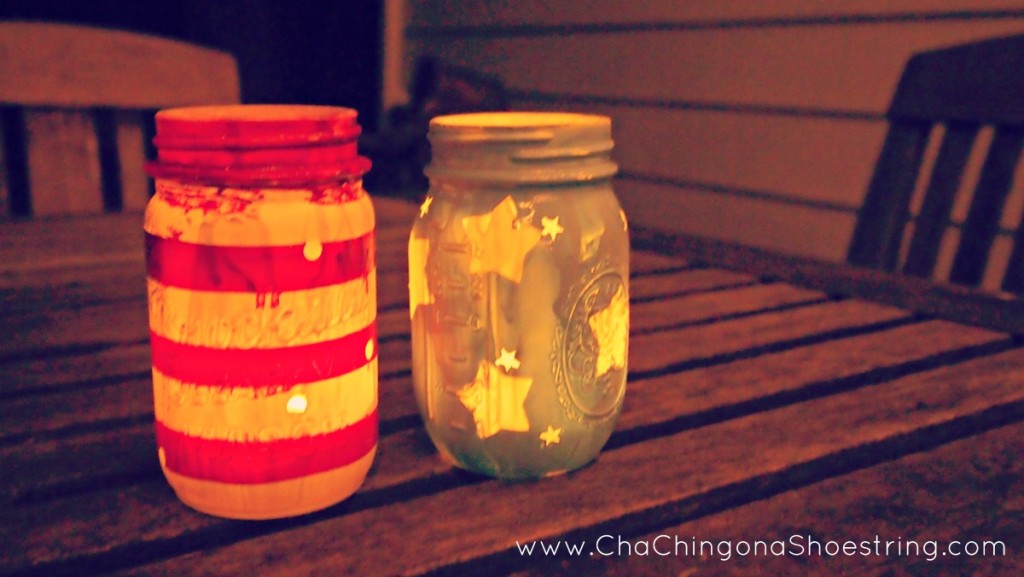
Technically, I’m not sure you’d call this organizing, but my mission this month was to look for simple patio decor ideas. And it doesn’t get much simpler than these DIY Patriotic Luminaries I created. You can find the tutorial here.

How I brought joy to life:

June was actually FULL of many joyful occasions – the last day of school, family vacation, a Taylor Swift concert (!), fun times at our local fair, my 13th (!) wedding anniversary, a family sing-along in honor of my Grandpa’s 89th (!) birthday, and more.

But the way that I specifically focused on joy this past month was by making lots of time to enjoy friends and family. We hosted several gatherings on our back patio, including a little “jam session” with a fun group of friends. As you can see, my 3 year old jumped right in with his guitar-playing”skills”.

First Jam session on the patio.

A photo posted by Kaley Ehret (@kaleyehret) on Jun 19, 2015 at 6:50pm PDT


Joyful, indeed.

So now I want to know:

What are YOUR Monthly Missions for July?

I’ve been really happy with this new strategy for planning simplicity and joy into my life and I’d love for you to join me.

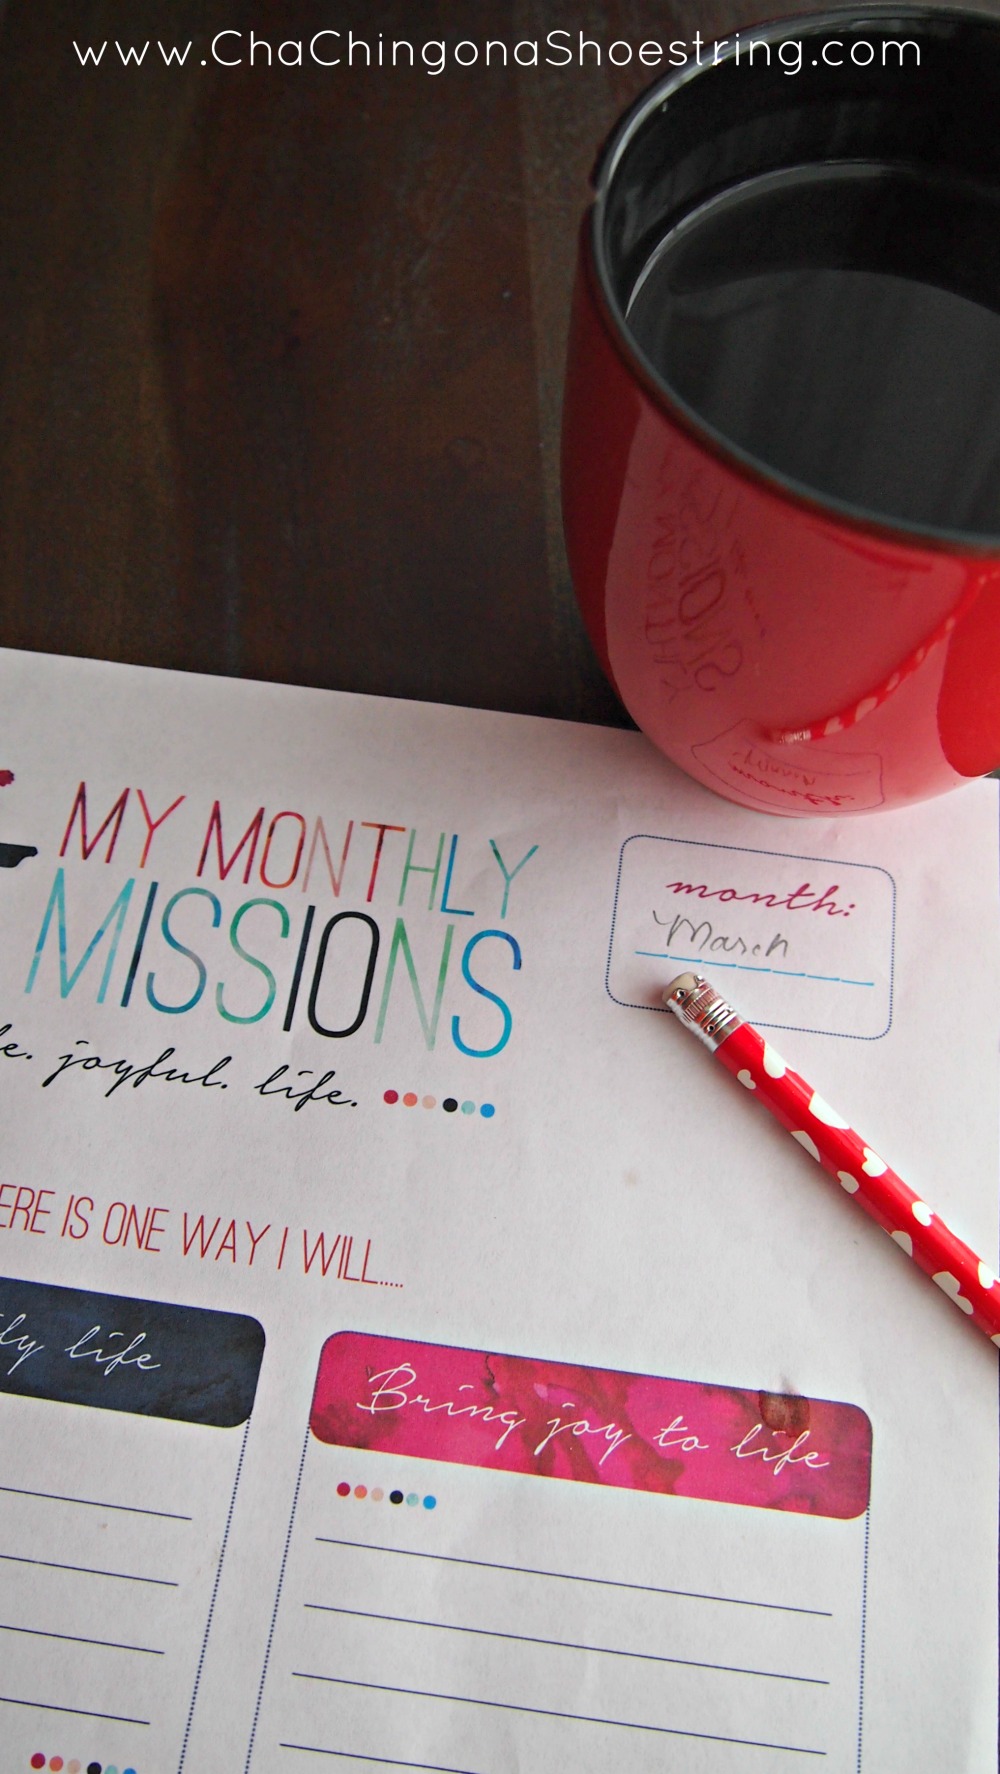
If you sign up for the Merry Little Living Project email newsletter, you’ll receive a free printable Monthly Missions planner in your inbox right away. (Also, a free Summer Fun planner!)

Then sometime in the next few days, grab your printable, a cup of coffee and a pencil and map out your missions for the month.

And then – if you’d like a little bit of accountability – share your missions in the comment below. Let’s help each other celebrate Simple, Joyful Life!

I’ll be sharing what my missions are this month in my Merry Little Living Project newsletter so be sure to click here to sign up if you haven’t yet!

Monthly Missions

Filed Under: Merry Little Living, Simple Living Tagged With: noads

Our Super Simple Chore System

July 6th, 2015 By Kaley
This post may contain affiliate links, which means I will make a small commission if you click and make a purchase.

Our Simple Chore System


I have tried a variety of chore systems through the years. I even bought a really cool personalized chore chart system for each of my boys with laminated velcro chore buttons I could organize each day of the week.

In spite of how cool it was, it didn’t work.

It did, however, open my eyes to this truth:

If it’s not simple, it’s not for me.

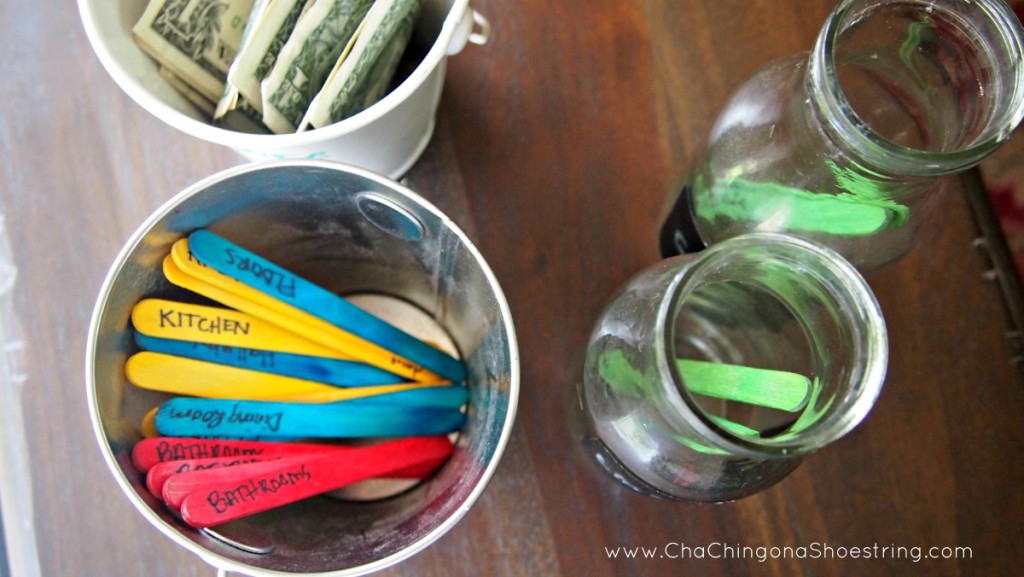
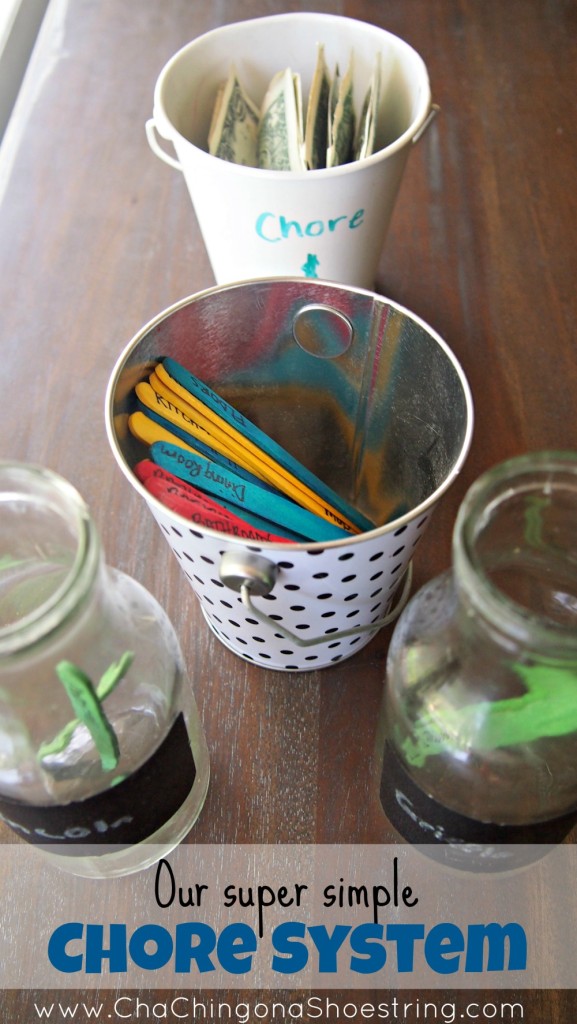
So, last summer, I grabbed a few items I already had on hand: colored popsicle sticks, a couple little buckets from Target’s Dollar Spot and some empty Frappuccino bottles – and developed a new chore system.

It’s simple and I love it. 

So I’m implementing it again this summer. Here’s how it works:

Our Simple Chore System

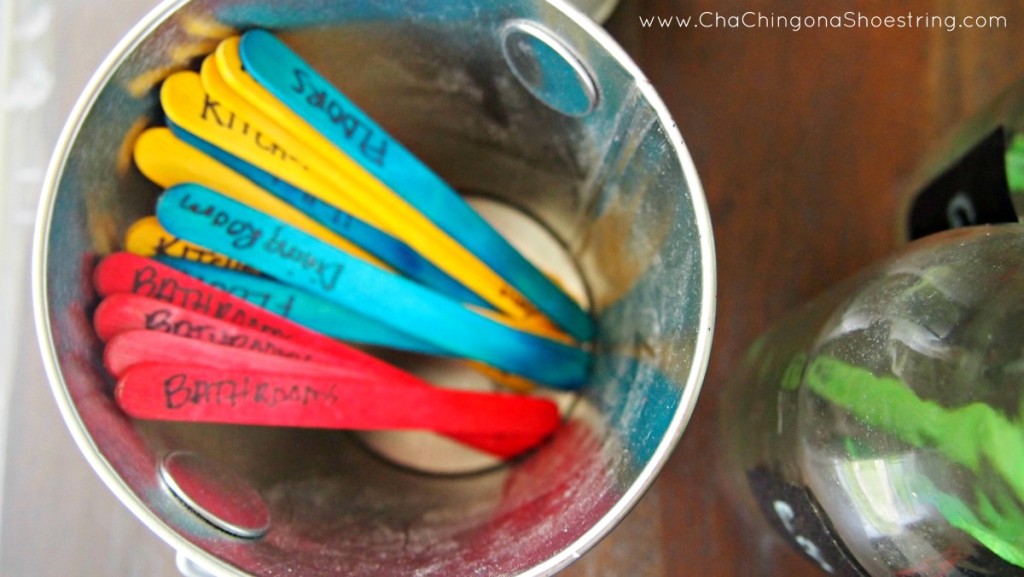
I labeled one side of the popsicle sticks with a room or area of the house:

-Bathroom

-Dining Room

-Kitchen

-Floors

(We focus on one area per day, and it ends up being about 4 days per week.)

Then I labeled the other side of each popsicle stick with a chore specific to that area: 

Bathrooms:

-Toilets

-Showers/Tub

-Floors

-Sinks/Mirrors

Downstairs:

-Pick up Toys

-Dust

-Vacuum

-Organize TV area

Kitchen:

-Vacuum/Sweep

-Mop

-Scrub Table/Chairs

-Scrub Sink/Counters

Floors:

-Hallway

-Boys Room

-Dining Room

-Living Room

Each day at chore time, I determine which area we will focus on and each of my two older boys randomly selects two of the chore sticks designated for that location.

When the chore is done, they place their chore sticks in their own jar. At the end of the week, they count up how many sticks they’ve collected and I pay them $0.50 per chore. (You may opt to pay more or less per chore based on your circumstances.)

I’ve also learned the importance of a Chore $$ bucket. I try to keep a stash of ones and quarters in the jar so that when it comes time to pay, I actually can. (Much easier than going to the bank every week – which usually just results in a long list of I.O.U.’s!)

I like this system for a number of reasons: 

-It’s flexible. I like the fact that I can choose which area needs to be focused on each day – rather than being locked into a set schedule. I guess that’s partly due to my free spirit and partly because you just never know what kinds of dirt these boys might track in from day to day!

-It helps eliminate the “How come he gets the easier chores?” complaint since they receive their chores randomly each day.

-Kind of a no-brainer, but it helps keeps my house clean! The boys are responsible to help with a few other tasks throughout the week like laundry and setting the table and such. But it’s worth it to me to pay for these chores that go above and beyond to keep the house cleaner. I love seeing them learn about the value of money in the process as well.

Chore System for Kids

How about? What kind of chore system works for you?

Filed Under: Merry Little Living, Simple Living Tagged With: noads

Easy DIY Patriotic Mason Jar Luminaries

June 26th, 2015 By Kaley
This post may contain affiliate links, which means I will make a small commission if you click and make a purchase.

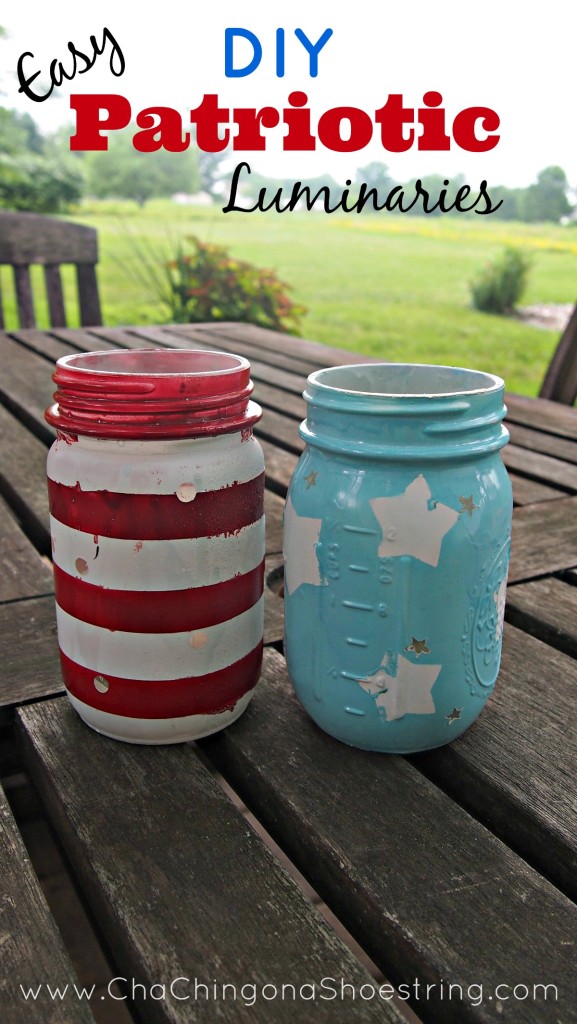
Easy DIY Mason Jar Patriotic Luminaries

One of my monthly missions this month was to find simple patio decor ideas.

I happened upon these fun patriotic luminaries on Pinterest and thought to myself: “That looks like a simple patio decor idea!”

And indeed it was. What made it even simpler is that with a few little tweaks, I had every single supply already on hand. Score!

Here’s how I made them in three easy steps:

Step 1:

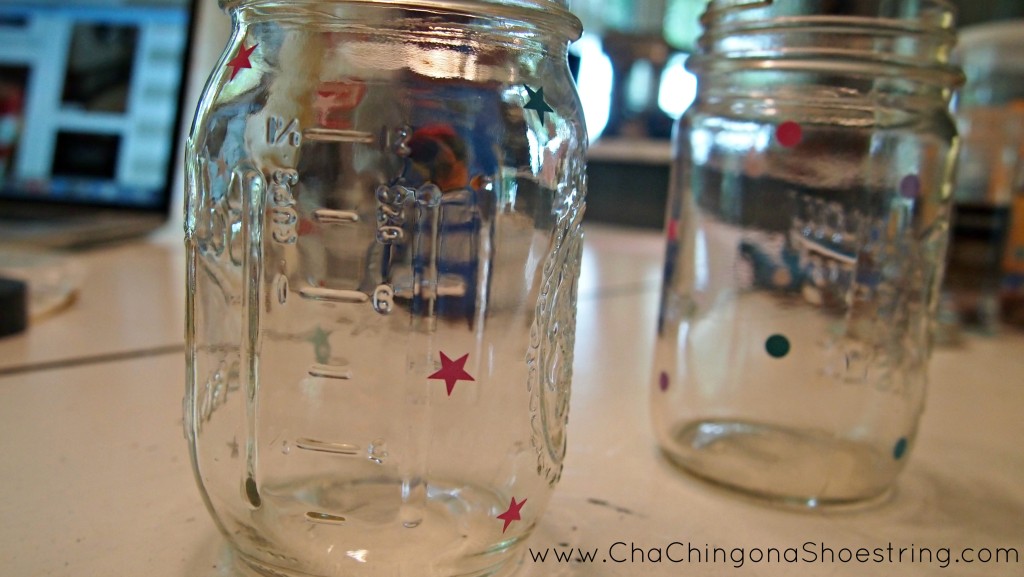
I happened to have a nice supply of circle and star stickers from my scrapbooking days which worked perfectly to create a mask to peel off later in order to let light shine through. I then spray painted these with white for the first layer and let them dry.

Easy DIY Luminaries

Step #2:

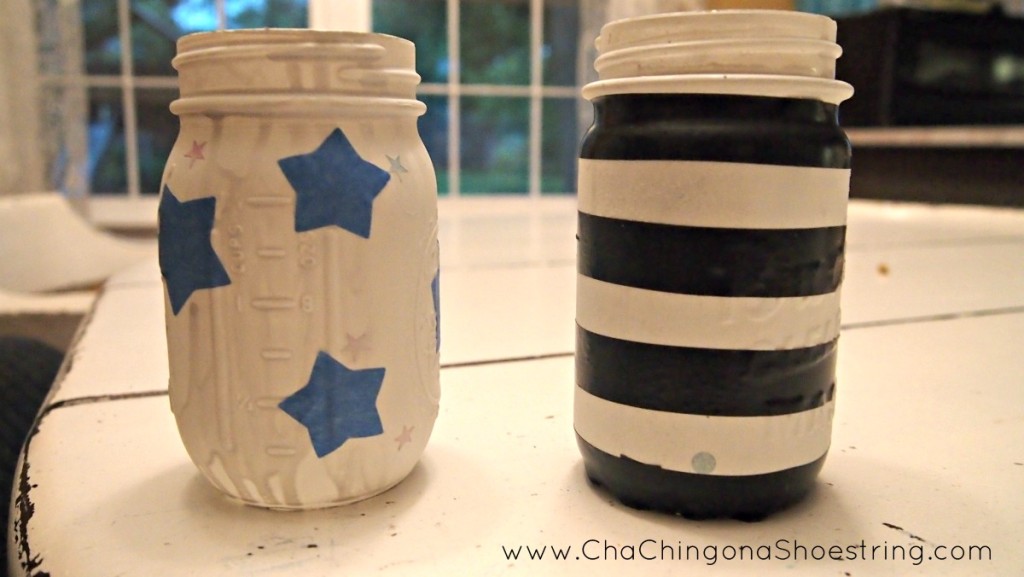
Once the first layer of spray paint had dried, I added the decorative touches. I didn’t have larger star stickers, but I do own a star shaped paper cutter (yes – also from my scrapbooking days!). I used it to cut stars out of some painter’s tape we had on hand. Then, to create the red and white flag-lined effect, I added four rows of electric tape to the second mason jar. Then I spray painted the starred jar blue and the lined jar with a red spray paint.

On a side note, if there is a way to spray paint jars without the paint dripping and looking uneven, I’m not sure what it is. For that reason, I do recommend using regular paint rather than spray paint if you have it on hand.

Actually, now that I’m thinking of it, I guess I could have just used a paint brush after I spray painted, huh? Thwack. (That was the sound of me smacking my head, in case you weren’t aware.)

Well, there you go. Use a paint brush when you are done to avoid the dripping effect. You’re welcome. 🙂

Easy DIY Mason Jar Luminaries

Step #3:

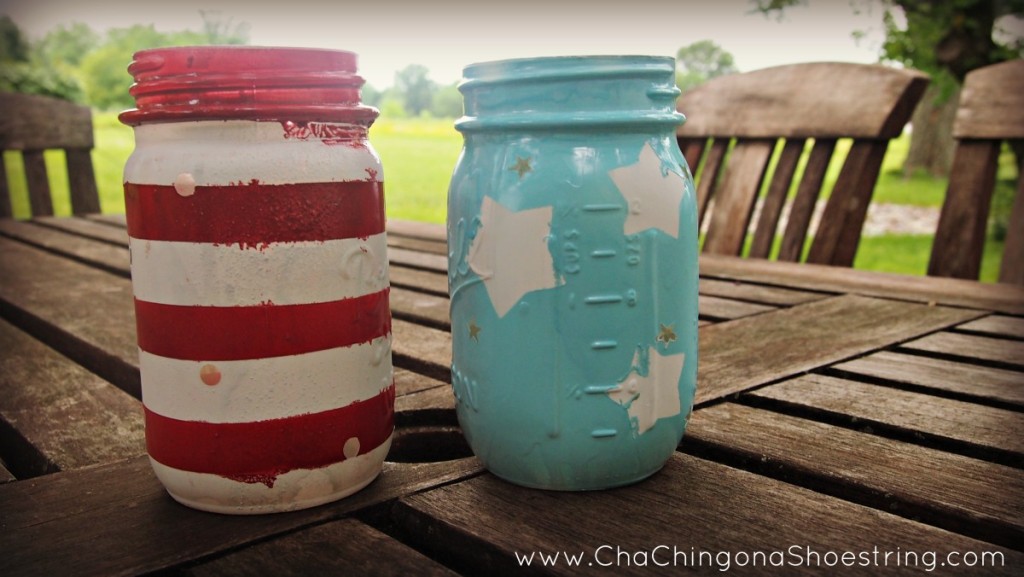
When the paint had dried, I peeled off all of the stickers and tape revealing the patterns and the holes for the lights to shine through.

There was some drippage and they didn’t turn out perfectly, but I’m just going to declare them Shabby Chic – and pretend that was my plan all along.

Easy DIY Patriotic Mason Jar Luminaries

Easy peasy.

Then I just placed some tea lights in them and watched them glow. Optionally, you could use sandpaper once they dry for a distressed look.

Easy DIY Patriotic Luminaries

They were a fun addition to our first patio party of the summer!

Now, pardon me, while I go get ready for tonight’s patio party – thankfully, festive luminaries are already checked off my list!

Thanks to Addicted to DIY for this fun idea!

You may also like:

Dirt Cake Recipe
Fun 4th of July Jello Recipe
Strawberry Slushies Recipe – just 10 Cents a Glass!

Filed Under: Merry Little Living, Simple Living Tagged With: noads

My Monthly Missions for May Update {The Merry Little Living Project}

June 3rd, 2015 By Kaley
This post may contain affiliate links, which means I will make a small commission if you click and make a purchase.

My Monthly Missions

Happy June, friends!

What do you look forward to most at summertime?

For me, summer embodies the exact goal of The Merry Little Living Project – Simple, Joyful Life.

That’s what my hopes and dreams are for this summer anyway. I picture grilling on our patio with friends, enjoying fun and free activities with my boys, swimming, fair-going, playing outside and just soaking up the beauty of a simpler schedule.

As much as I hope that will just fall into place this summer, however, I know that even a simple schedule needs a plan. I’m sharing all about that plan in my next Merry Little Living Project email (you can subscribe here if you want to know how I’m going to make it happen!)

In the meantime, here is my update from May’s Monthly Missions. Last month, I asked myself four questions:

  • What is one way I can simplify life this month?
  • What is one way I can practice a healthy habit this month?
  • What is one way I can organize life this month?
  • What is one way I can bring joy to life this month?

Here’s what I came up with:

How I simplified life:

ALDI $50 Menu Plan

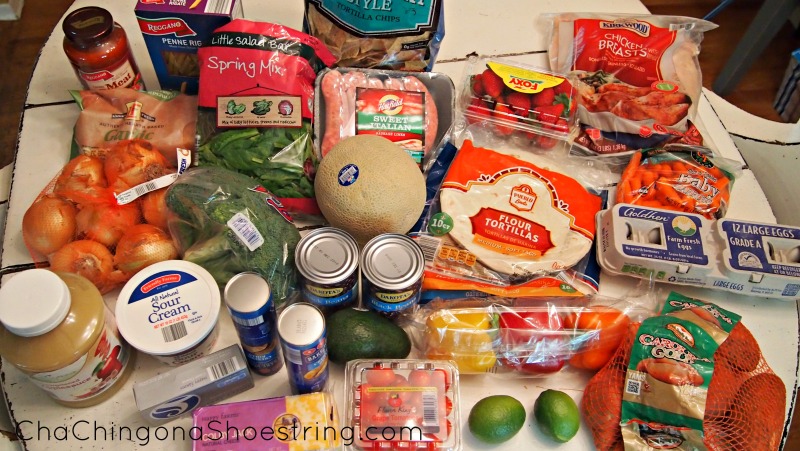
I shared last month that I am working on a simple and inexpensive 5 day menu plan using ALDI ingredients. Pictured above are the ingredients. I made some really yummy and – yes – simple and inexpensive meals with those ingredients. Stay tuned for the menu plan soon!

How I practiced a healthy habit:  

I committed to eating eggs for breakfast last month and for the most part, I stuck with my commitment. I have to admit though – I really don’t crave eggs for breakfast. As much as I want to like them, I’d much rather just grab a bowl of cereal. But, I think I need to keep trying. Or better yet, maybe you have some suggestions for simple and  healthy breakfast ideas?

How I organized life: 

I finally did it! I tackled my filing cabinet.

Ok. True confessions. I didn’t work on it until today. And I set my timer and only spent 15 minutes working on clearing out old files. But it’s pretty fantastic what a deadline and a focused 15 minutes can accomplish.

How I brought joy to life: 

Puppy Birthday Cake

I shared in last month’s Merry Little Living email that we had to cancel my three year old’s birthday party at the last minute because he woke up with the stomach bug. As disappointing as that was, we quickly got it rescheduled for the following weekend. Every single person we invited was able to come and the weather turned out to be gorgeous. Also, it turns out that freezing a cake actually makes it even yummier, I think.

I’ll share a post with more pictures soon!

The Color Dash

I also had a blast running a Color Dash with a group of friends. We were much more colorful that this picture lets on.

So now I want to know:

What are YOUR Monthly Missions for June?

I’ve been really happy with this new strategy for planning simplicity and joy into my life and I’d love for you to join me.

If you sign up for the Merry Little Living Project email newsletter, you’ll receive a free printable Monthly Missions planner in your inbox right away.

Then sometime in the next few days, grab your printable,  a cup of coffee and a pencil and map out your missions for the month.

And then – if you’d like a little bit of accountability – share your missions in the comment below. Let’s help each other celebrate Simple, Joyful Life!

I’ll be sharing what my missions are this month in my Merry Little Living Project newsletter so be sure to click here to sign up if you haven’t yet! 

Monthly Missions

Filed Under: Merry Little Living, Simple Living Tagged With: noads

Wild Blueberry Coconut Bars Recipe

May 27th, 2015 By Kaley
This post may contain affiliate links, which means I will make a small commission if you click and make a purchase.

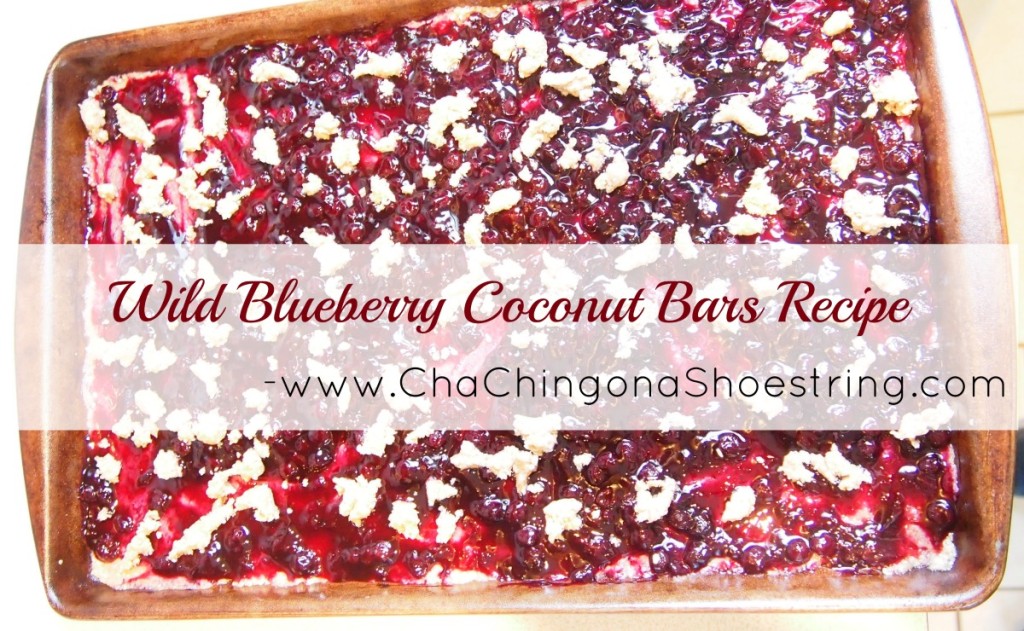
Wild Blueberry Coconut Bars Recipe

Here’s another recipe from my Freezer Baking Day session. My friend Elizabeth offered to contribute this post since she actually did all the work on this one! And in case you are wondering – Yes. Elizabeth has 6 kids. So she wins the Awesome Award.

 ***

As I was planning what to make for my Freezer Baking Day with Kaley, specifically for lunches, I really loved the idea of having a “nutri-grain” bar type of snack. I went searching for a recipe on Pinterest of course, but it was actually difficult to find one that was simple and healthy. I finally settled on Wild Blueberry Coconut Bars. I loved that this recipe had coconut flakes and ripe bananas, two ingredients I always have on hand.

The other thing that appealed to me about the bars was there was no added sugar, except for the organic jam. I wasn’t sure this would appeal to my kids, but I was willing to give it a try. I didn’t have organic blueberry jam so I improvised and made my own. Something I do often trying to feed 8 people three times a day!!

Kaley did find Organic Blueberry Jam at ALDI, so we were able to try both versions.

I will admit, the bars did not turn out like I expected. The crust was much thinner than the pictures and the crumb topping did not cover the bars like I would have liked.

But the end result was almost like a thin crust blueberry pizza! My kids enjoyed the bars and I was thrilled to serve them a healthy, nutritious, yummy snack in place of a bar with too many ingredients to count or even pronounce.

So now that we’ve found a healthy version of fruit pizza, I am still on the hunt for an easy Nutri-Grain-like bar that I can have on hand for kids lunches or snacks on the go! Any suggestions?

 Wild Blueberry Coconut Bars Recipe:

For the Blueberry Jam, I used a simple recipe I found that didn’t need pectin. I adapted the recipe from Crafts Ala Mode.

Here’s how I made it:

Ingredients:

  • 2 cups blueberries, fresh or frozen (I used frozen wild blueberries from Costco)
  • ½ cup of sugar
  • 1 and ⅓ tablespoon lemon juice
  • Almost 1 teaspoon lemon zest

Put all ingredients in a saucepan and bring to a boil. Simmer for about 30 minutes, stirring occasionally until it is thickened, like jam.

And here is the recipe for the bars:

Adapted from Healthy Adjustments

Organic Wild Blueberry Coconut Bars

Serves: 12 bars (Although I cut mine smaller to make more!)

Ingredients:

  • ½ cup organic sweetened coconut flakes
  • ½ cup organic unsweetened coconut flakes
  • 1 cup organic quick oats
  • ½ cup organic whole wheat flour or regular white flour
  • ¼ tsp. salt
  • 1 tsp. ground cinnamon
  • ¼ tsp. nutmeg
  • 6 tbsp. butter
  • 1 banana mashed
  • ½ organic wild blueberry jam or homemade blueberry jam

 Instructions:

  • Pre-heat oven to 375 F.
  • Line a 11×13″ baking sheet with either tin foil and spray it with a baking spray or with parchment paper. Set aside.
  • In a food processor place both sweetened and unsweetened coconut, oats and flour, pulse till all the mixture is fine like the flour.
  • Place it into a bowl, add salt, cinnamon and nutmeg, whisk to combine.
  • Mash a banana on a plate using a fork till it is creamy and smooth.
  • Melt unsalted butter, then mix in the mashed banana and pour it into the bowl with the coconut, oats and flour. Mix till all ingredients are moistened and it is crumbled. Reserve about ⅓ cup of the mixture and spread the rest of it out onto the baking sheet. Press it down to form a crust.
  • Spread the ½ cup of organic wild blueberry jam across the crust evenly then sprinkle the remaining crumbled mixture you reserved over top across the entire pan.
  • Place in the oven bake for 25 minutes.
  • Remove from oven when done baking it should have a nice golden brown color.
  • Allow it to cool for 5-10 minutes cut it into 12 bars or less if you want smaller bars.

They will stay fresh in an airtight container for 1 week in the fridge or frozen individually.

***

Note from Kaley: My family really enjoyed these. It’s a nice sweet but healthy treat to add to a lunch. And I thought they tasted great even straight from the freezer!


Filed Under: Merry Little Living, Recipes, Simple Living Tagged With: noads

“Honey of a Couple” Anniversary Gift One-Minute Tutorial

May 19th, 2015 By Kaley
This post may contain affiliate links, which means I will make a small commission if you click and make a purchase.

***

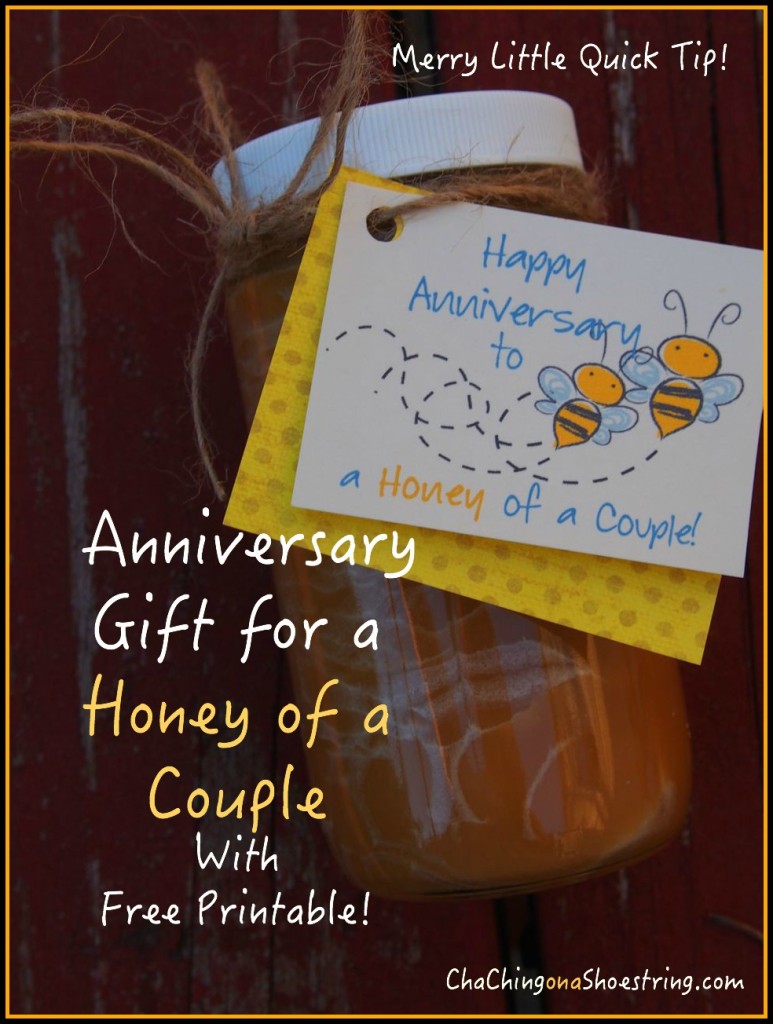
It’s been a little while since we’ve heard from the Dollar Store Diva (a.k.a. my MOM), but she can’t stay away for long! She has a fresh new idea that I think you guys are really going to enjoy. I already love this first quick tip for a super cute, super easy anniversary gift!

Anniversary Gift

Introducing…

Nancy’s Merry Little Quick Tips!

From time to time I will whip up a tip that might add some merry to your day. I will often present it to you in a super-quick slideshow video.

Hope this one-minute video will inspire you:

https://chachingonashoestring.com/wp-content/uploads/2015/05/Anniversary-Quick-Tip-SD-480p_3.m4v

Click here for the free Honey of a Couple Anniversary card printable.

Filed Under: Craft Ideas, Giving, Merry Little Living Tagged With: Dollar Store Diva, Nancy's Merry Little Quick Tips, noads

  • « Previous Page
  • 1
  • 2
  • 3
  • 4
  • 5
  • Next Page »

Welcome

About
Contact

My  name is Kaley. Wife, Mama, and Dreamer, I have a passion for saving money, living simply, and helping others find creative ways to live large on a limited budget.

My Favorite Things

Copyright © 2025 Kaley Ehret · Site Design by Sharon Hujik · Log in
Disclaimer | Disclosure Policy | Privacy Statement