Cha-Ching on a Shoestring™

Living Large on a Limited Budget

  • STORES
    • Coupon Database
    • CVS
    • Rite Aid
    • Walgreens
    • Target
    • Walmart
  • Restaurants
  • Online Deals
    • Amazon Deals
    • Amazon Subscribe & Save Deals
  • Freebies
    • Free Kindle Books
    • Free Stuff by Mail
    • Free Birthday Stuff
    • Free Stuff Online

How I Made Valentines Without Spending Any Money

February 12th, 2016 By Elizabeth
This post may contain affiliate links, which means I will make a small commission if you click and make a purchase.

blog title

I’m delighted to invite my friend Elizabeth to the blog today to share how she made Valentines on the cheap this year (you may remember her from this popular post).

She is a creative and thrifty Mom of 6 who makes it look much easier than it should be. This post is a perfect example of her frugal super powers!

***

After working three days straight, I was down to the wire for classroom Valentines for my three elementary school children. My youngest was sleeping and I didn’t want to run to the store, so I decided to try to work with what I already had. Here’s what I came up with!

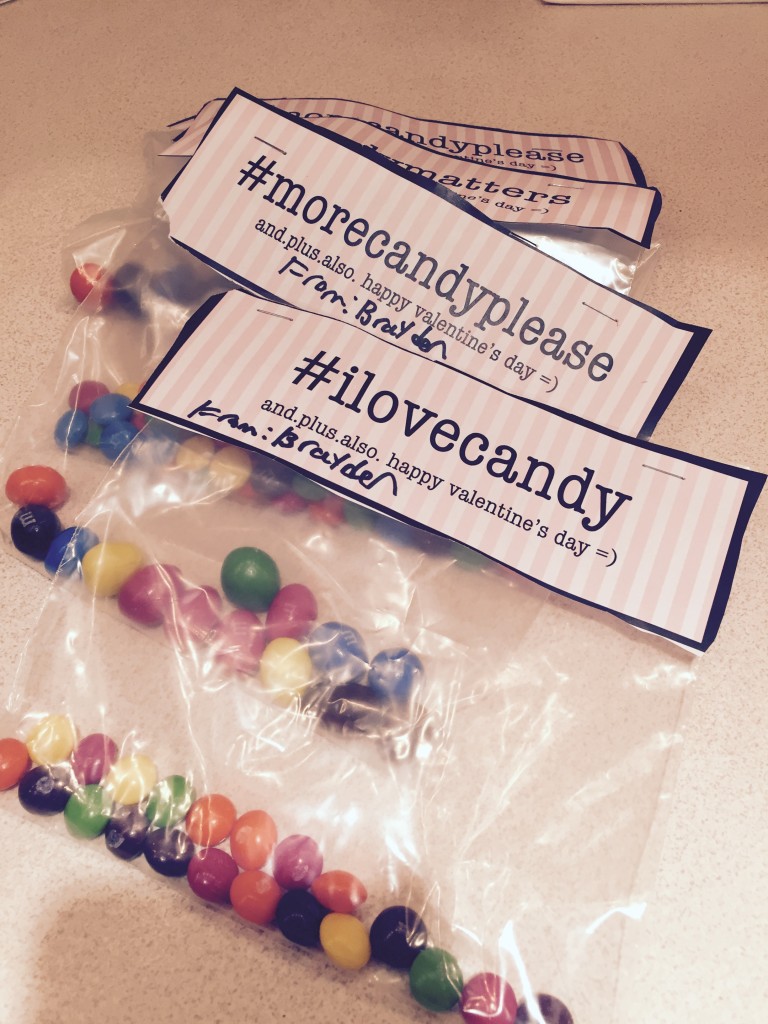
I found this great printable on Pinterest (of course!) for my fifth grader. I thought the hashtag was super cute and I had a few bags of M&M’s stashed in the freezer that I could divide up into sandwich bags. I printed them out, he signed his name and we stapled them to the bag. Done!

FullSizeRender (5)

Source

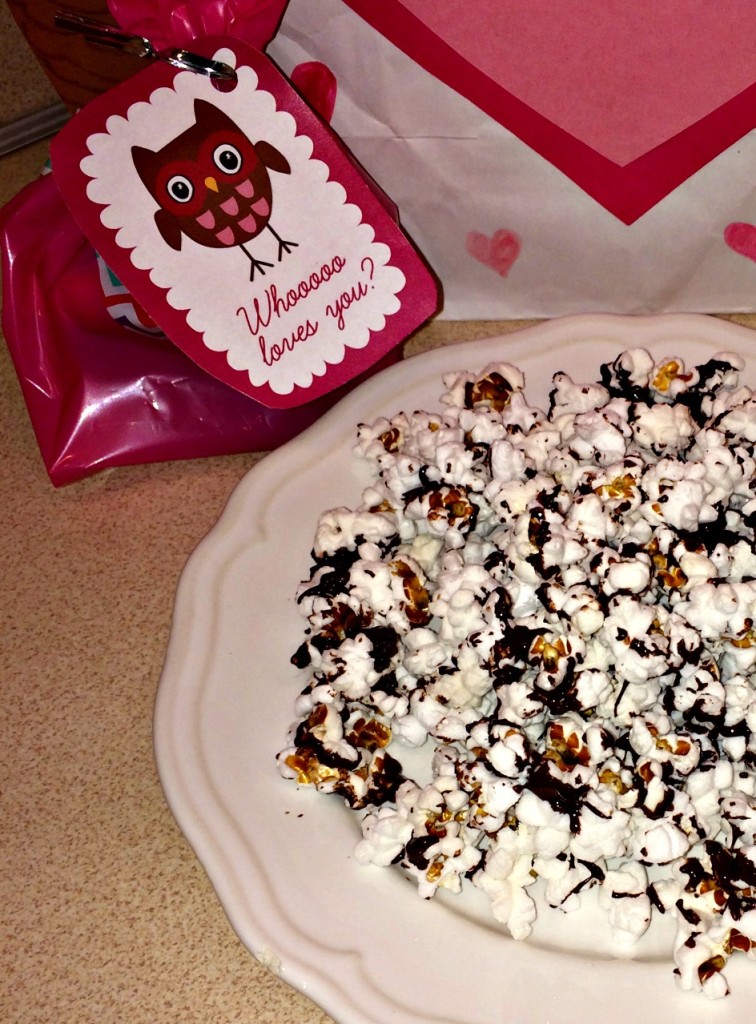
Two things I like to have on hand are chocolate chips and popcorn kernels. I love to make popcorn for a frugal and healthy snack. To make it a Valentine treat, I simply melted semi-sweet chocolate chips and drizzled it over the warm popcorn. I popped it into the fridge to harden and then divided into snack bags for my second grader’s classmates.

I had cute little treat bags I bought on clearance last year at Target for pennies. I tucked the snack bags into the treat bags and we added a cute Owl tag, which was also a free printable. Done and done!

popcorn

Source

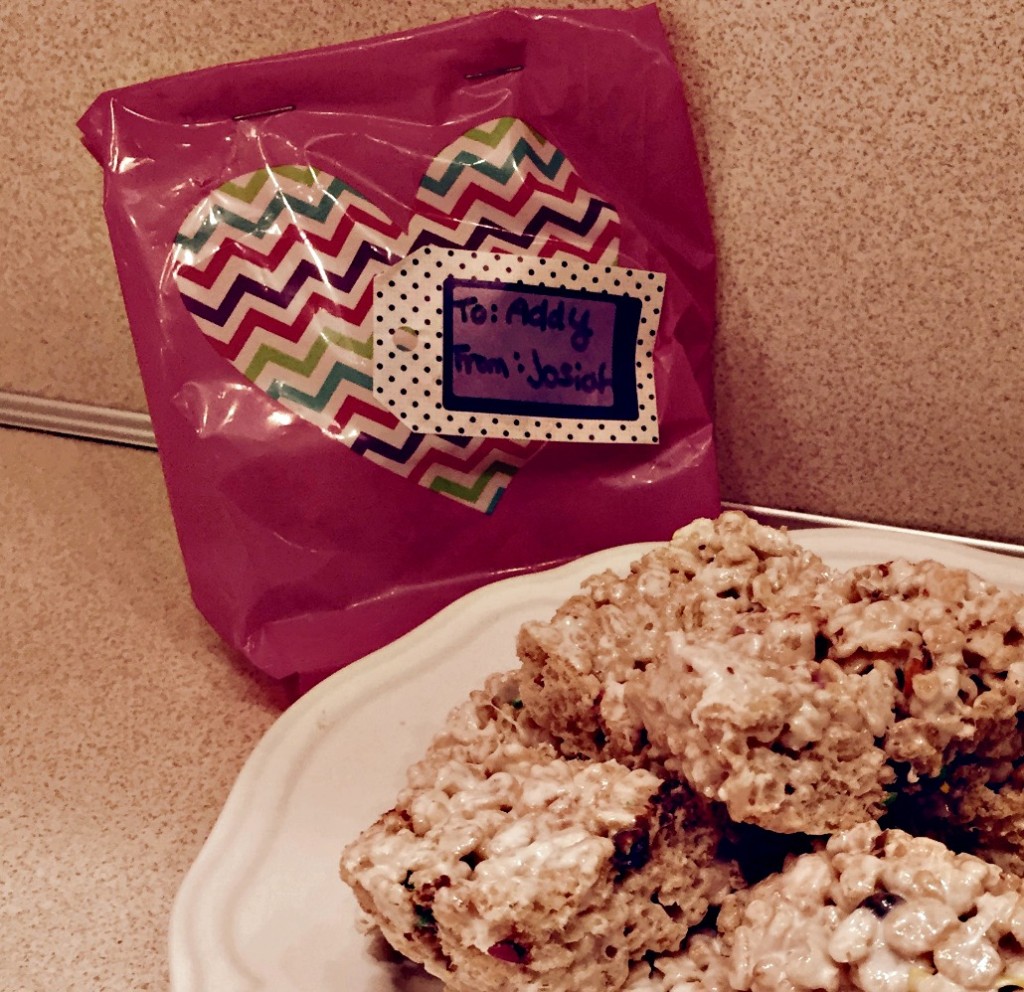
Another easy and quick frugal treat is the three ingredient Marshmallow Crispy bars. Crispy Rice cereal, mini marshmallows and butter and you are good to go! I had a small amount of mini chocolate chips that I added to the bars to make them even more yummy. I packaged a bar in each little treat bag and added a sticker tag for each of my kindergartners classmates.

ricekrispie

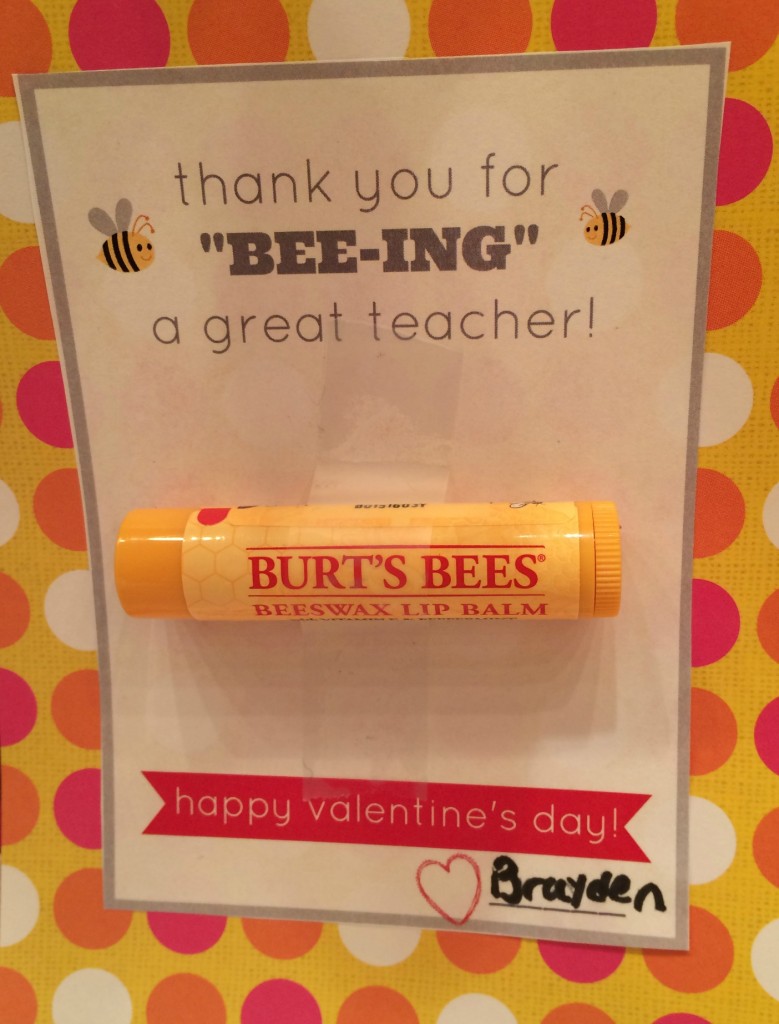
I found a cute printable for the teachers as well. Whenever Amazon has a sale on Burt’s Bees chapstick, I stock up and use them for small gifts because I’m always seeing printables for chapstick with a holiday theme. I put together three of these in no time with scrapbook paper and scotch tape.

chapstick

Source

Last but not least, my second grader needed to decorate a bag to collect her Valentine treats. Her teacher sent home a plain white bag. I found a picture of an owl themed Valentine box, but I thought it would work perfectly for the bag too. We used construction paper and glue we already had to decorate the bag. My oldest daughter helped with this and I love how it turned out!

bag

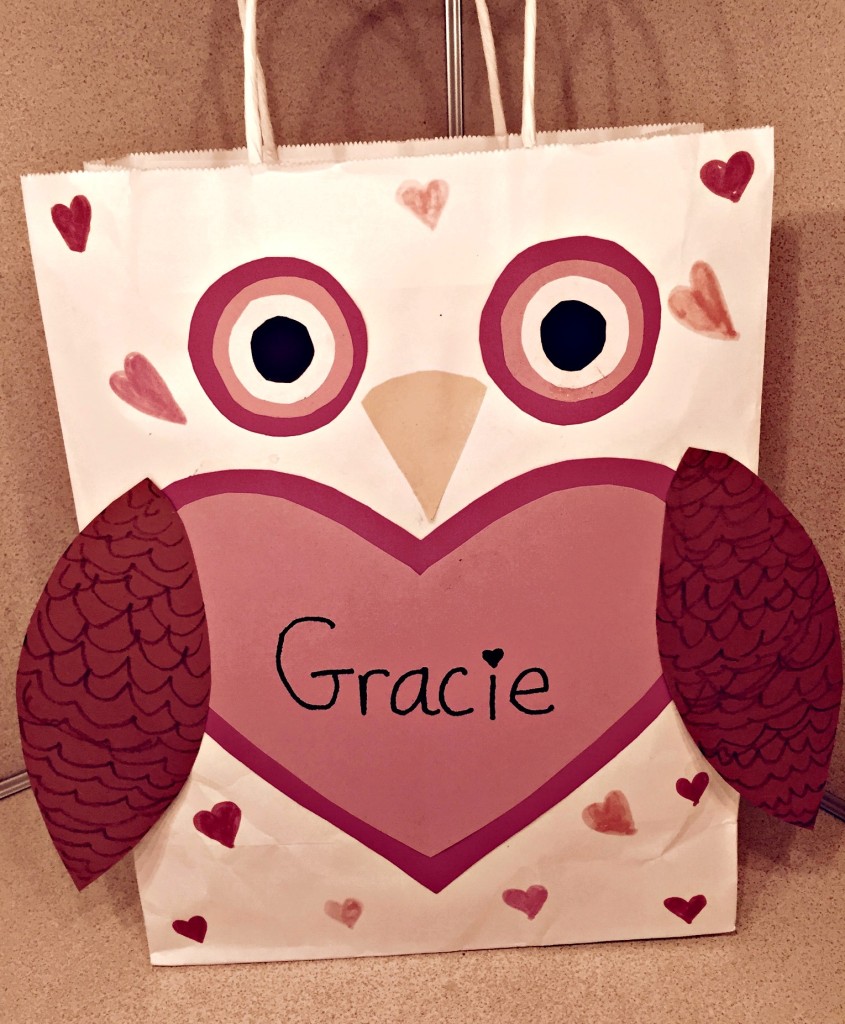
I was thrilled that within about an hour I had made three different valentines for three different kids, a quick teacher valentine and a valentine treat bag without spending any money!

Filed Under: Merry Little Living, Simple Living Tagged With: Free Stuff Online, noads, valentine's day

No Bake Oatmeal Energy Bites Recipe {Healthy and Delicious Snack!}

January 21st, 2016 By Kaley
This post may contain affiliate links, which means I will make a small commission if you click and make a purchase.

Energy Bites Recipe

No-Bake Oatmeal Energy Bites Recipe {Healthy and Delicious!}

You guys. I must apologize.

I have been holding out on you.

I have meant to share this Energy Bites Recipe with you for like…ever. But I haven’t.

Sure, you might be saying “No big deal. Don’t worry about it” now. But the problem is that once you try them, I have a feeling that you are going to be wicked mad at me.

They are that good. 

They are so good, that you would think that they must be bad for you. But they aren’t. (Just don’t tell my kids – they consider them dessert.)

And to top it all off, they are ridiculously easy to make. (In fact, I just took a break in the middle of this post to go make a batch real quick. Five minutes later, the dough is chilling in the fridge – most of the dough, that is. Ahem.)

Healthy, Delicious, Easy.

BAM. The trifecta of Goodness.

So, let me not keep you waiting any longer.


Print
No Bake Energy Bites Recipe

Yield: Makes 20 - 25 balls.

Adapted from Smashed Peas & Carrots .

Ingredients

  • 1 c. dry oatmeal
  • 2/3 c. toasted coconut flakes
  • 1/2 c. peanut butter (or other nut butter)
  • 1/2 c. ground flaxseed or wheatgerm (I occasionally skip this step if I don't have any on hand.)
  • 1/2 c. chocolate chips
  • 1/3 c. honey
  • 1 tsp. vanilla
  • 1/2 c. raisins (optional - but oh so yummy!)

Instructions

  1. Stir all ingredients until thoroughly mixed.
  2. Let chill in refrigerator for half hour.
  3. Once chilled, roll into balls of whatever size you like.
  4. Store in an airtight container for up to 1 week.
3.1
https://chachingonashoestring.com/2016/01/21/no-bake-oatmeal-energy-bites-recipe/

This was the final recipe from the freezer baking afternoon that my friend Elizabeth and I had last year. (Sigh…that’s how long I’ve been holding out on you. Love me anyway?) These freeze well, although they don’t usually last us long enough to make it to the freezer!

Here are the rest of our Freezer Baking Day recipes:

–Chewy, No-Bake Granola Bars

–Homemade Instant Oatmeal “packets”

–Wild Berry Coconut Bars


No Bake Oatmeal Energy Bites

Filed Under: Merry Little Living, Recipes Tagged With: noads

My Monthly Missions Update: A BIG Announcement!

October 9th, 2015 By Kaley
This post may contain affiliate links, which means I will make a small commission if you click and make a purchase.

My Monthly Missions

Sometimes I get a little obsessed with passionate about things.

If you recall in my last Monthly Missions update (which was actually two months ago…ahem), I committed to Do Hard Things for the month of August.

Turns out, Doing Hard Things gets easier the more you Do Them.

So September rolled around and I just kept Doing those Hard Things.

I couldn’t help myself.

And I got so caught up in those Hard Things that I forgot to take the time to update you guys on my progress.

This also means that I did not ask myself our four Monthly Missions questions:

  • What is one way I can simplify life this month?
  • What is one way I can practice a healthy habit this month?
  • What is one way I can organize life this month?
  • What is one way I can bring joy to life this month?

But that is life, friends. Some seasons require us to focus more energy on one area of life than another.

In this month’s Merry Little Living newsletter, I share an update on one of the Hard Things, so sign up here and look for an email from me if you’d like to know all the details. (Hint: I reached an exciting goal that has to do with this picture:)

Beautiful day for a 5k! Could somebody please cheer me on though? #noonetorunwith #needmoralsupport #help #runlikethewind

A photo posted by Kaley Ehret (@kaleyehret) on Sep 20, 2015 at 1:20pm PDT

And the other Hard Thing I focused on for the past two months is related to my BIG Announcement.

Drumroll please…

Big Announcement:

I’m so excited to announce that in the next few weeks I will be releasing my very first eBook! 

I’m sharing all the secrets that I’ve discovered through the years on my quest for a simpler, more joyful Christmas. HUGE thanks goes to those who have been a part of our Merry Little Christmas Project community.  It may have all started that year I cried on Christmas, but I can truly say that I approach Christmas with joy and anticipation now instead of dread and I want to help you do the same!

I can’t wait to share more details soon!! If you’d like to be the first to hear about the book’s release, click here to sign up for my Merry Little Living newsletter.


Merry-Little-Christmas-v3-300x225


I want to add a special thanks to those of you who read my Monthly Missions update every month (err…almost every month!). Whether you guys realize it or not, you’ve provided the motivation that I needed to complete my eBook. Thank you.

I’ve also chosen to embrace the fact that I love writing. And the more I write, the more I’m becoming a Writer. It’s a learning process that I happen to love.

Will I become a bestseller? That’s beside the point. (But hey – a girl can dream!). I’m still a Writer. It’s what I do. I write.

So now I want to know:

Who are YOU? 

Want to embrace something that you love? Need a little encouragement? Leave a comment below sharing who YOU are.

Don’t be intimidated. We’ll cheer you on!

Monthly Missions for October:

If you’d like, you can also participate in our Monthly Missions. (I have ONE mission this month – to finish my eBook!)

If you sign up for the Merry Little Living Project email newsletter, you’ll receive a free printable Monthly Missions planner in your inbox right away.

Then sometime in the next few days, grab your printable,  a cup of coffee and a pencil and map out your missions for the month.

And then – if you’d like a little bit of accountability – share your missions in the comment below. Let’s help each other celebrate Simple, Joyful Life!

Monthly Missions

Filed Under: Merry Little Living, Simple Living Tagged With: noads

My Monthly Missions Update for July {Llamas , The Month of Hard Things and More}

August 2nd, 2015 By Kaley
This post may contain affiliate links, which means I will make a small commission if you click and make a purchase.

My Monthly Missions

I’m declaring August the month I’m going to Do Hard Things.

I’ve been thinking about this for a couple of weeks now. We’ve had our fun this summer swimming and park-going and dressing up like cows. It’s been delightful.

But with our travels done for the summer and only 30 days until we are on our back to school schedule, I’m feeling like I want to finish up summer with a bang. I have a few things hard things I want to tackle that will just seem more joyful and less hard in the sweet days of summer.

Want to know what they are? Well, I’m telling all in this month’s Merry Little Living newsletter, so sign up here and look for an email from me with the inside scoop!

In the meantime, here is my update from July’s Monthly Missions. This past month, I asked myself four questions:

  • What is one way I can simplify life this month?
  • What is one way I can practice a healthy habit this month?
  • What is one way I can organize life this month?
  • What is one way I can bring joy to life this month?

Here’s what I came up with:

How I simplified life: 

I took a little break from Facebook and it was refreshing. I did check notifications and there were a few times I allowed myself to break the rules. Such as the other day when I posted this status on FB:

Screen Shot 2015-08-01 at 3.43.59 PM

It’s times like this that Facebook is a helpful resource, y’know?

By the way, turns out swallowing whole packs of gum shouldn’t be too much of an issue – according to the nurse I talked with, while she held back her laughter. We are still monitoring the situation.

How I practiced a healthy habit:  

I promised to learn some new recipes using the veggies from my garden and I did! I tried a yummy cucumber salad recipe (which I forgot to Pin!) and this green bean recipe (which was AWESOME, by the way).

I also shared my secret to getting your kids to eat broccoli.

Delicious Roasted Broccoli Recipe with Garlic and Lemon

This recipe will change your life and make your dreams come true.


How I organized life: 

This past month, I spent some time gathering old videos to have them digitized. I’m using a service called LegacyBox.com which sends you a box that you fill with the number of items you pay to have transferred. They are all boxed up and ready to go. I can’t wait to get a glimpse of my boys when they were teeny tiny and my various hairstyles through the years (which were not so teeny tiny) – should be fun!

How I brought joy to life: 

Llelfie.

A photo posted by Kaley Ehret (@kaleyehret) on Jul 27, 2015 at 2:35pm PDT

We spent some time last week helping my husband’s parents move out of their house of 37 years. As you can imagine, it was hard work. I think we got a little loopy after a while, as evidenced by my Llefie above (taken on a day that we took a little break at a local Animal Park) as well as this picture of me demonstrating the beauty of one the treasures we discovered while cleaning out the house.

It’s good to make joy, isn’t it?

So now I want to know:

What are YOUR Monthly Missions for August?

I’ve been really happy with this new strategy for planning simplicity and joy into my life and I’d love for you to join me.

If you sign up for the Merry Little Living Project email newsletter, you’ll receive a free printable Monthly Missions planner in your inbox right away. (Also, a free Summer Fun planner!)

Then sometime in the next few days, grab your printable,  a cup of coffee and a pencil and map out your missions for the month.

And then – if you’d like a little bit of accountability – share your missions in the comment below. Let’s help each other celebrate Simple, Joyful Life!

OLYMPUS DIGITAL CAMERA

I’ll be sharing what my missions are this month in my Merry Little Living Project newsletter so be sure to click here to sign up if you haven’t yet! 


Filed Under: Merry Little Living, Simple Living Tagged With: noads

Delicious (and Easy!) Roasted Broccoli Recipe that Your Kids Will Beg For

July 29th, 2015 By Kaley
This post may contain affiliate links, which means I will make a small commission if you click and make a purchase.

Delicious Roasted Broccoli Recipe with Garlic and Lemon

By nature, I am a dreamer. My list of “Lofty Dreams for my Future” includes such “shoot-for-the-stars” unattainable goals as:

  • Become independently wealthy and travel the world on my own private jet.
  • Invent something that will bring about world peace.
  • Find a way to get my kids to eat broccoli.

I know. I know. That last one is pretty crazy, right?

That’s what I thought too.

And then my Dreams came true. (Well…at least one of my dreams.)

My kids now beg for broccoli. 

I don’t know how it took 30 mumble-mumble years for me to realize that broccoli does not have to be served bland and limp. I had fallen victim to the lie at some point in my life that fixing a dish of broccoli meant boiling it to the point of removing any flavor, but with a dash of salt and pepper to “spice things up”. Every once in a while, when I was feeling generous, I’d throw a slice of American cheese on top to disguise the fact that I was trying to get my kids to eat my lawn…er…their veggies.

And then one day, I decided to throw caution to the wind and follow an actual Broccoli Recipe, motivated by my friend Heidi’s suggestion of this recipe. I’ll admit – I was a skeptic. Broccoli was bland and limp. I was confident that there was no hope for broccoli.

I am now a believer.

There’s no turning back now, folks. The minute my kids started stealing broccoli from my plate and my husband told me that he could just eat this for dinner, I knew my life was changed forever.

Roasted Broccoli with Lemon and Garlic Recipe

Here’s the recipe that will change your life too:

Roasted Broccoli Recipe with Lemon and Garlic

(adapted from The Amateur Gourmet)

Ingredients: 

2 large bunches of broccoli

6 Tbsp Olive oil

1 1/2 tsp salt

1/2 tsp fresh ground pepper

4 Garlic cloves

1 Lemon

1/3 cup freshly grated Parmesan cheese

Recipe:

1. Preheat the oven to 425.

2. Cut broccoli into florets (they will shrink, so don’t cut them too small.) If you choose to wash your broccoli, be sure to dry it thoroughly.

3. Line a cookie sheet with aluminum foil and place the broccoli on it – making sure to space it out evenly. Toss with about 5 Tbsp olive oil, salt and pepper.

4. Toss in 4 garlic cloves that are peeled and sliced. (You can also opt to grate your garlic over the broccoli.)

5. Roast in the oven 20 to 25 minutes. The tips of some of the florets will be browned when it is done.

6. After taking the broccoli out of the oven, zest a lemon over it, then squeeze the lemon juice over the broccoli. You can also add 1.5 Tbs more olive oil (although I often forget to do this) and then top it off with the freshly grated Parmesan cheese.

Roasted Broccoli Recipe

This precious little floret was stolen from my plate. This delights me.

The Merry Little Living Project

Check out more posts in my Merry Little Living series. 

Filed Under: Merry Little Living, Recipes, Simple Living Tagged With: noads

Get-It-Done-Now Tool for Procrastinators {with Printable}

July 23rd, 2015 By Kaley
This post may contain affiliate links, which means I will make a small commission if you click and make a purchase.

Do It Now Printable

I am a busy woman. {Feel free to add your name to the Busy Person List.}

In addition, I am a busy woman who regularly procrastinates. {There’s a list for that too; you can sign your name under mine.}

I have learned that procrastination is not my friend; it has created so much unnecessary stress in my life. Then add to procrastination my issue with ADD and…

ARRRGHHH!!

During the years that I ran a home business, I knew that I had to have a strategy to help me accomplish the things that I simply dreaded to do. That’s when I came up with this little ditty:

Do It Now for Procrastinators

“Nancy,” I’d say to myself, “do it now; do it cheerfully; and do it well.”

The little “ditty” has proven to be a helpful get-things-done-now tool, and I still repeat it often.

But merely chanting the refrain isn’t enough. I have so much I have procrastinated on that I have to first decide what “it” is in “Do it now”.

That’s where this handy-dandy tool comes in:

DIY Procrastination Strategy
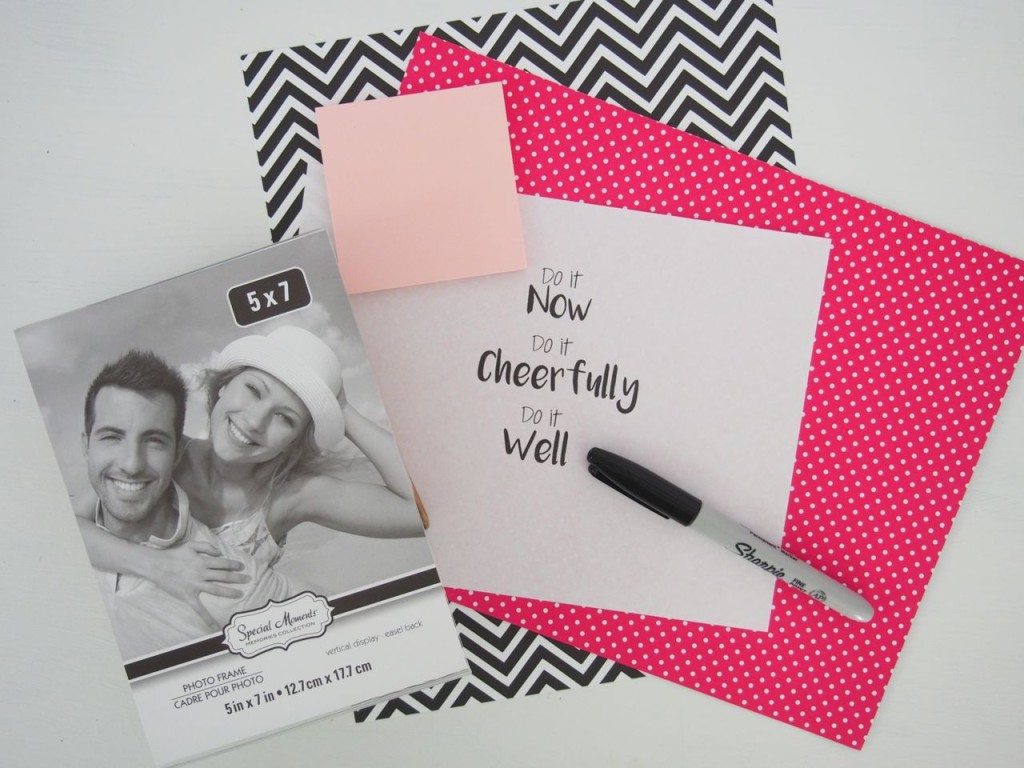
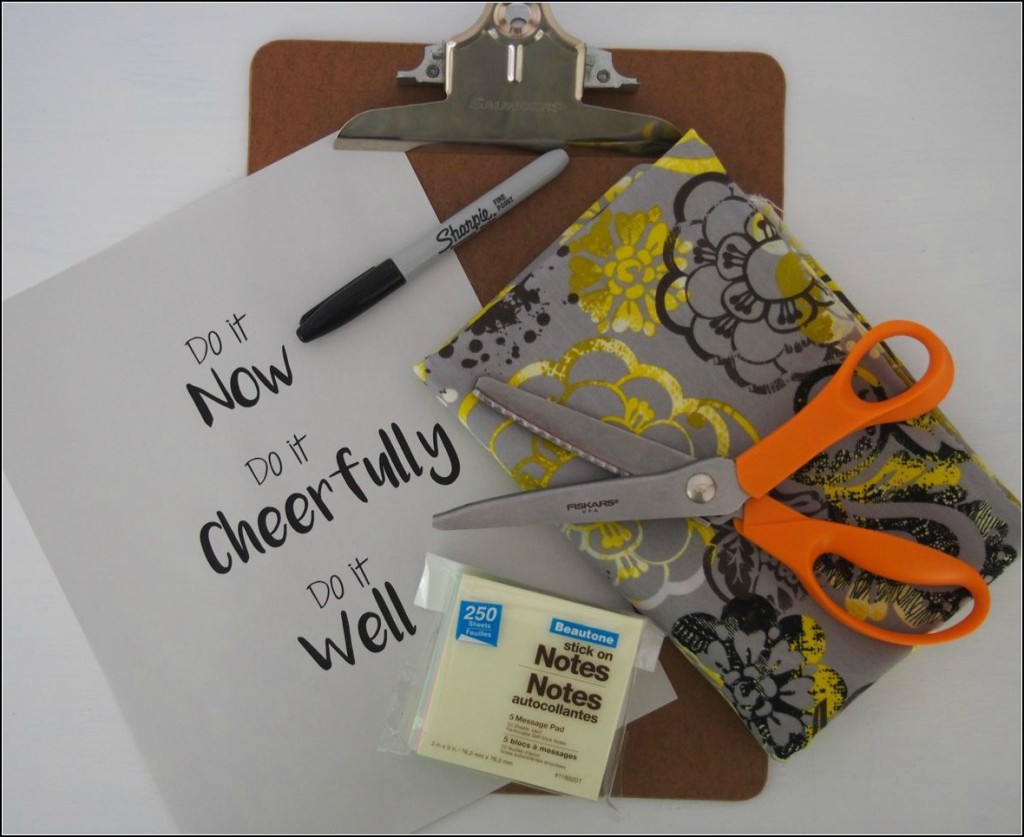
A few inexpensive supplies are needed:

Dollar Store Clip Board ……Dollar Store Sticky Notes……Scrap of Fabric……Pinking Shears……Dollar Store Sharpie……Do it Now Printable

Dollar Store Procrastination Tool 
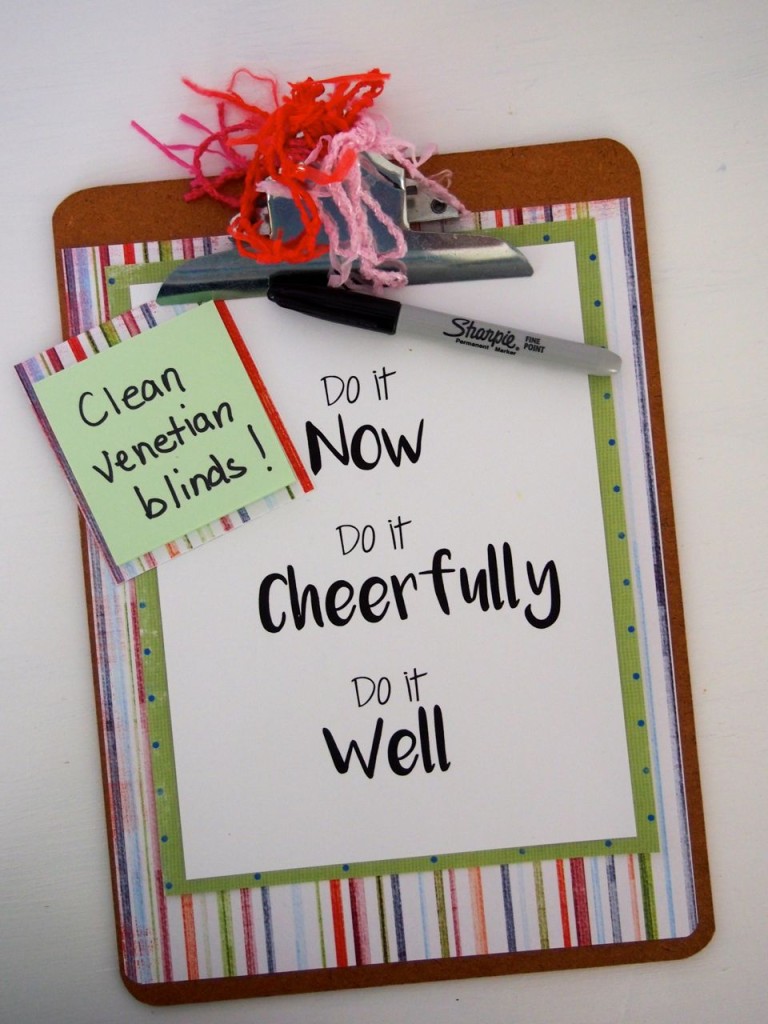
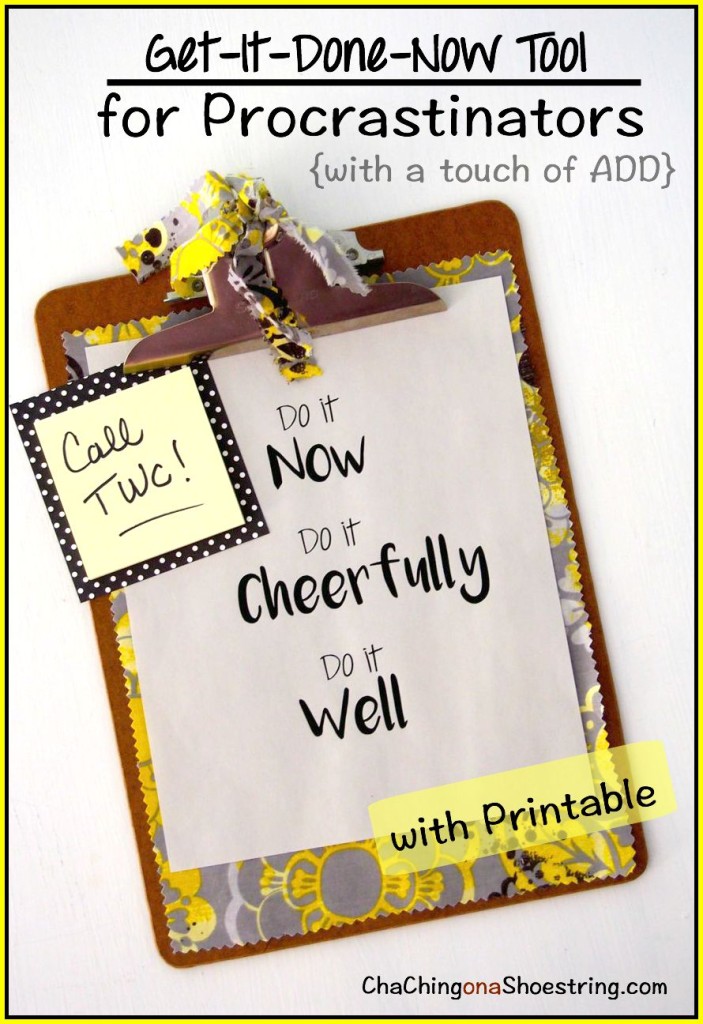
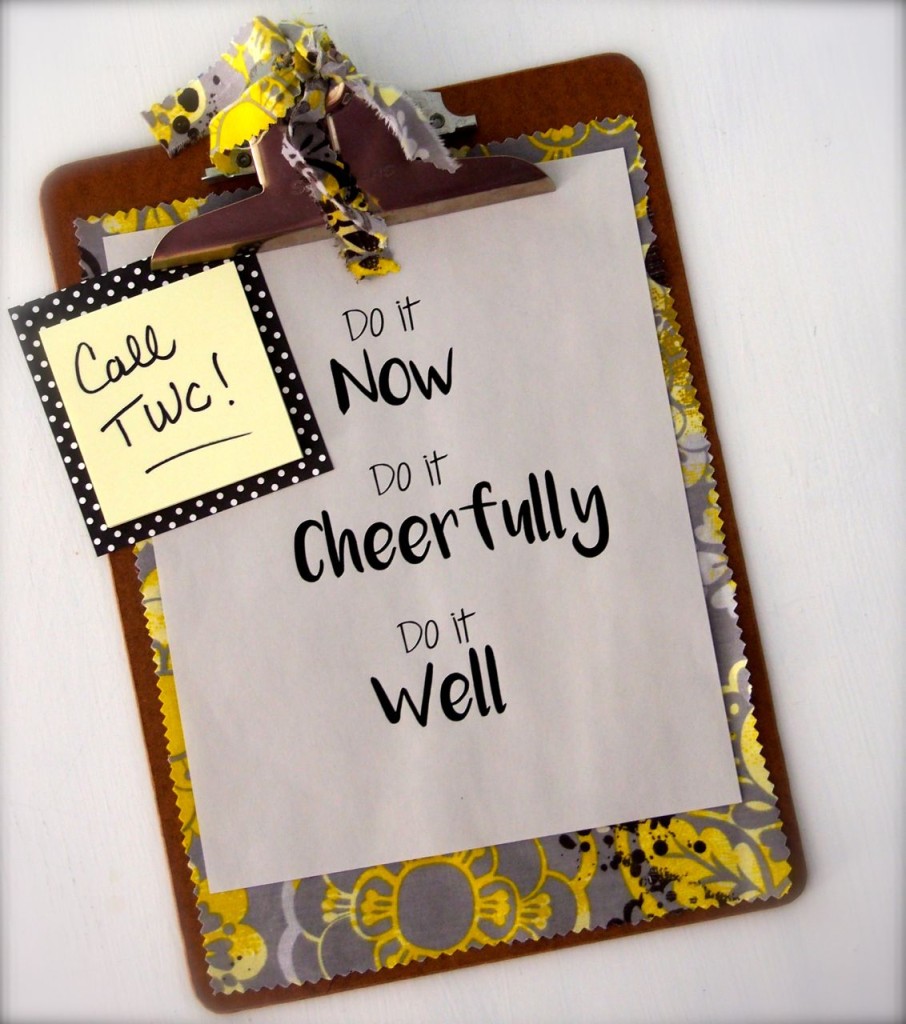
I used the pinking shears to cut the fabric a bit smaller than the board and then slipped the fabric and trimmed-to-size printable under the clip. Four sticky-note pads come in the Dollar Tree package, so I matted one pad on a scrap of decorative cardstock and slipped that under the clip to hold it in place.

The magic here is the sticky notes.

Here is where I decide what the it is. I had been having trouble with my cable for months–yes, folks, months. But I absolutely dreaded calling the cable company. So I put it off…and I put it off…and I put it off. Then one day I decided that calling TWC was my it for the day–whether I wanted to do it or not.

So I wrote “Call TWC” in bold letters on the yellow pad. {That note absolutely could not be ripped off until the job was actually done.}

And I did it!

It was every bit as stressful as I had suspected it would be (over an hour on the phone with two different technicians), but it had to be done, and I did it!

Besides that, it was done cheerfully, and it was done well.

Change the ARRRGHHH!! to AAHHHH!!

Dollar Store Tool for Procrastinators

Another idea is to mat the printed motto with two layers of scrapbooking paper instead of fabric. [Surely I’m not the only one who has procrastinated on cleaning her venetian blinds.]

DIY Tool for Procrastinators

For a smaller version to stand on a desk, I bought a 5×7 easel-back plastic frame at the Dollar Tree and used colorful cardstock to mat the Do It Now 5×7 Printable. 

DIY Procrastinator Strategy I didn’t attach the sticky pad to the frame, but I placed it nearby along with the Sharpie.

So there you have it. Decide what your it is for the day, then don’t remove the sticky note until it’s done.

Oh, and don’t forget: do it cheerfully and do it well.    🙂

***
dollar-store-diva

For those of you who haven’t met her, the Dollar Store Diva happens to be my Mom who has a special power.  She can transform Dollar Store and other inexpensive finds into super fun gifts that would brighten anyone’s day!

You may also like:

How a Dollar Store Notebook Helped my Add
How One Trip to the Dollar Store Solved my Linen Organization Crisis
My Life-Changing Organization System for Visual Learners

Filed Under: Craft Ideas, Organization Tagged With: Dollar Store Diva, noads

My Monthly Missions Update for June {Jam Sessions and Chore Systems and More}

July 7th, 2015 By Kaley
This post may contain affiliate links, which means I will make a small commission if you click and make a purchase.

My Monthly Missions

Tonight, my husband and my three boys and I stood very still and very quiet for what felt like a very long time.

It was definitely the stillest and quietest I’ve seen my three boys in – I think – ever.

In case you are wondering – we were deer watching. A mama and her baby were hanging out in the field behind our house and we were soaking it up. Maybe we will get a deer feeder to attract them over more often so we can get a few pictures of them! My friend told me that they got a deer feeder after doing some research at feedthatgame.com.

Such a simple pleasure, but the beauty of the evening and the joy of observing these creatures so closely as a family and the fun of hearing my three year old whisper, “She’s beautiful,” made it a moment to remember.

It’s just another reminder of why I started this thing called The Merry Little Living Project – to pursue this simple, joyful life.

Monthly Missions Update:

This past month, I asked myself four questions – the same four questions I’ve been asking every month this year:

  • What is one way I can simplify life this month?
  • What is one way I can practice a healthy habit this month?
  • What is one way I can organize life this month?
  • What is one way I can bring joy to life this month?

Here’s what I came up with:

How I simplified life:

Chore System for Kids

I re-instated our Summer Chore System. I kind of love it. While this was not the simplifying mission I intended to accomplish this month, I can’t think of a much better way to simplify life this summer.

How I practiced a healthy habit:

I continued running, which I can honestly say is something I enjoy in the summertime. My next 5K is tomorrow evening, so wish me luck and speedy feet! I set a goal this year to run three 5K’s this summer, so I’ll be signing up for another sometime soon!

How I organized life:

Easy DIY Patriotic Luminaries

Technically, I’m not sure you’d call this organizing, but my mission this month was to look for simple patio decor ideas. And it doesn’t get much simpler than these DIY Patriotic Luminaries I created. You can find the tutorial here.

How I brought joy to life:

June was actually FULL of many joyful occasions – the last day of school, family vacation, a Taylor Swift concert (!), fun times at our local fair, my 13th (!) wedding anniversary, a family sing-along in honor of my Grandpa’s 89th (!) birthday, and more.

But the way that I specifically focused on joy this past month was by making lots of time to enjoy friends and family. We hosted several gatherings on our back patio, including a little “jam session” with a fun group of friends. As you can see, my 3 year old jumped right in with his guitar-playing”skills”.

First Jam session on the patio.

A photo posted by Kaley Ehret (@kaleyehret) on Jun 19, 2015 at 6:50pm PDT


Joyful, indeed.

So now I want to know:

What are YOUR Monthly Missions for July?

I’ve been really happy with this new strategy for planning simplicity and joy into my life and I’d love for you to join me.

If you sign up for the Merry Little Living Project email newsletter, you’ll receive a free printable Monthly Missions planner in your inbox right away. (Also, a free Summer Fun planner!)

Then sometime in the next few days, grab your printable, a cup of coffee and a pencil and map out your missions for the month.

And then – if you’d like a little bit of accountability – share your missions in the comment below. Let’s help each other celebrate Simple, Joyful Life!

I’ll be sharing what my missions are this month in my Merry Little Living Project newsletter so be sure to click here to sign up if you haven’t yet!

Monthly Missions

Filed Under: Merry Little Living, Simple Living Tagged With: noads

Our Super Simple Chore System

July 6th, 2015 By Kaley
This post may contain affiliate links, which means I will make a small commission if you click and make a purchase.

Our Simple Chore System


I have tried a variety of chore systems through the years. I even bought a really cool personalized chore chart system for each of my boys with laminated velcro chore buttons I could organize each day of the week.

In spite of how cool it was, it didn’t work.

It did, however, open my eyes to this truth:

If it’s not simple, it’s not for me.

So, last summer, I grabbed a few items I already had on hand: colored popsicle sticks, a couple little buckets from Target’s Dollar Spot and some empty Frappuccino bottles – and developed a new chore system.

It’s simple and I love it. 

So I’m implementing it again this summer. Here’s how it works:

Our Simple Chore System

I labeled one side of the popsicle sticks with a room or area of the house:

-Bathroom

-Dining Room

-Kitchen

-Floors

(We focus on one area per day, and it ends up being about 4 days per week.)

Then I labeled the other side of each popsicle stick with a chore specific to that area: 

Bathrooms:

-Toilets

-Showers/Tub

-Floors

-Sinks/Mirrors

Downstairs:

-Pick up Toys

-Dust

-Vacuum

-Organize TV area

Kitchen:

-Vacuum/Sweep

-Mop

-Scrub Table/Chairs

-Scrub Sink/Counters

Floors:

-Hallway

-Boys Room

-Dining Room

-Living Room

Each day at chore time, I determine which area we will focus on and each of my two older boys randomly selects two of the chore sticks designated for that location.

When the chore is done, they place their chore sticks in their own jar. At the end of the week, they count up how many sticks they’ve collected and I pay them $0.50 per chore. (You may opt to pay more or less per chore based on your circumstances.)

I’ve also learned the importance of a Chore $$ bucket. I try to keep a stash of ones and quarters in the jar so that when it comes time to pay, I actually can. (Much easier than going to the bank every week – which usually just results in a long list of I.O.U.’s!)

I like this system for a number of reasons: 

-It’s flexible. I like the fact that I can choose which area needs to be focused on each day – rather than being locked into a set schedule. I guess that’s partly due to my free spirit and partly because you just never know what kinds of dirt these boys might track in from day to day!

-It helps eliminate the “How come he gets the easier chores?” complaint since they receive their chores randomly each day.

-Kind of a no-brainer, but it helps keeps my house clean! The boys are responsible to help with a few other tasks throughout the week like laundry and setting the table and such. But it’s worth it to me to pay for these chores that go above and beyond to keep the house cleaner. I love seeing them learn about the value of money in the process as well.

Chore System for Kids

How about? What kind of chore system works for you?

Filed Under: Merry Little Living, Simple Living Tagged With: noads

  • « Previous Page
  • 1
  • 2
  • 3
  • 4
  • 5
  • 6
  • 7
  • Next Page »

Welcome

About
Contact

My  name is Kaley. Wife, Mama, and Dreamer, I have a passion for saving money, living simply, and helping others find creative ways to live large on a limited budget.

My Favorite Things

Copyright © 2025 Kaley Ehret · Site Design by Sharon Hujik · Log in
Disclaimer | Disclosure Policy | Privacy Statement