Cha-Ching on a Shoestring™

Living Large on a Limited Budget

  • STORES
    • Coupon Database
    • CVS
    • Rite Aid
    • Walgreens
    • Target
    • Walmart
  • Restaurants
  • Online Deals
    • Amazon Deals
    • Amazon Subscribe & Save Deals
  • Freebies
    • Free Kindle Books
    • Free Stuff by Mail
    • Free Birthday Stuff
    • Free Stuff Online

The Dollar Store Diva: Handcrafted Journal Tutorial with Printable

November 4th, 2016 By Kaley
This post may contain affiliate links, which means I will make a small commission if you click and make a purchase.

Handcrafted Thank You

See part 1 of this post here.

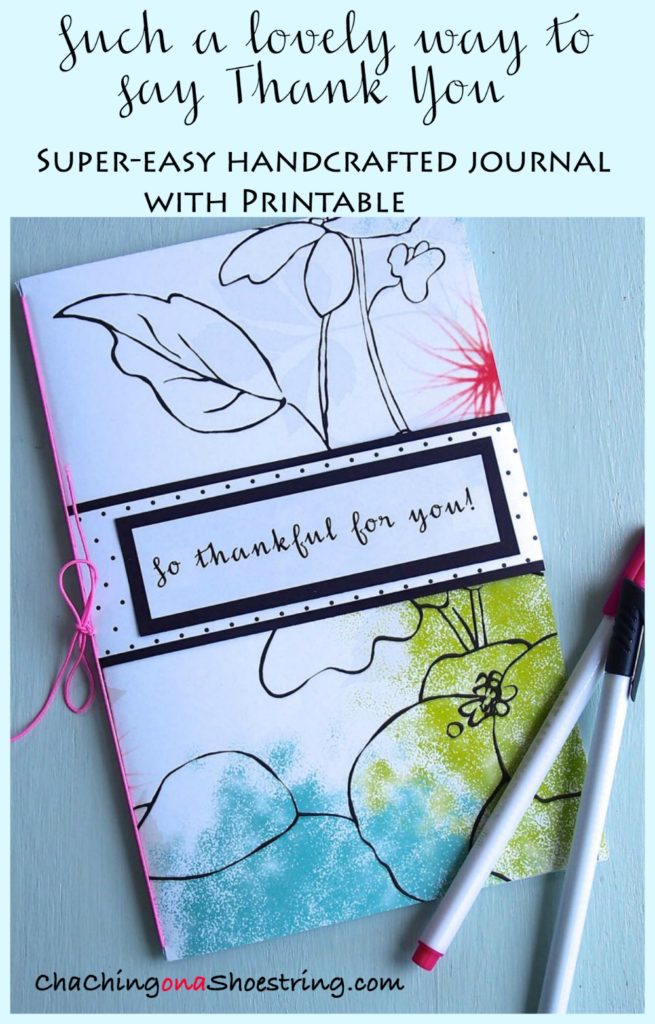
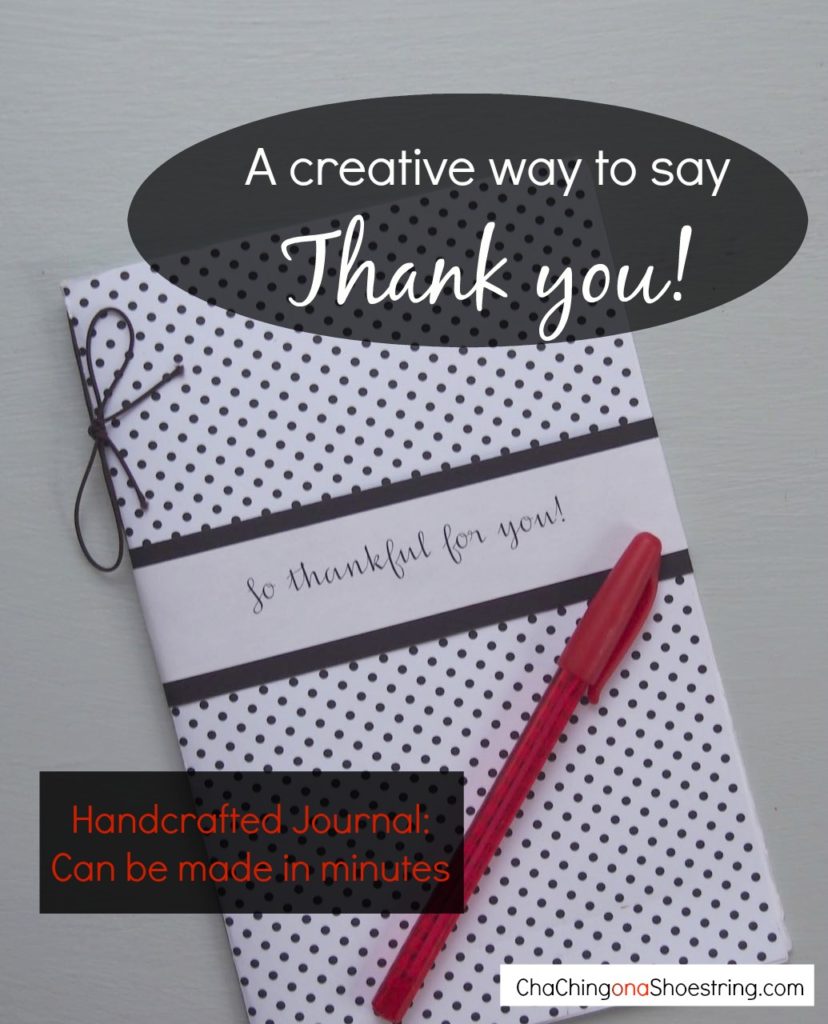
The gift of a handcrafted journal is such a lovely thing.

Once my friends and I decided we wanted to create some small gifts to bless special people in our life who have blessed us, this idea seemed the perfect place to start.

I searched online for journal-making ideas, and I found some impressive tutorials. But they included scary words such as tapestry needles, binding awls, coptic stitch binding, and screw punches. That all sounded a bit too ambitious for me.

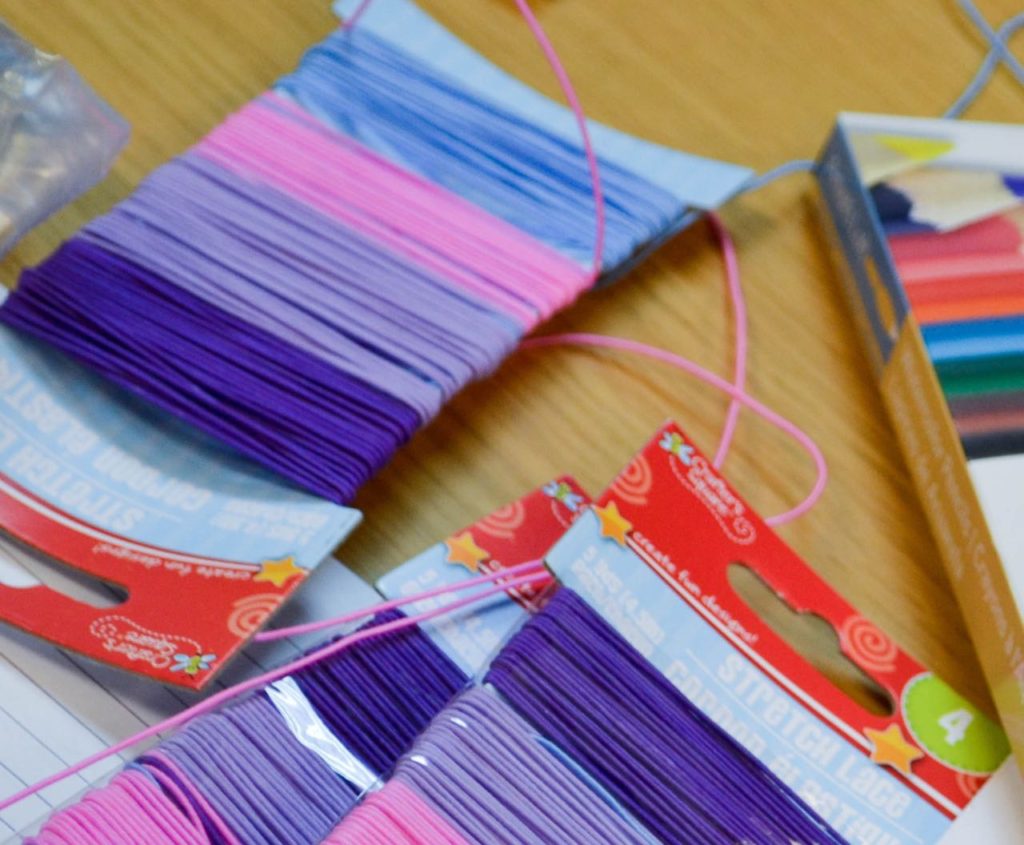
Then one day I came across a roll of elastic cord in my craft cabinet. Inspiration struck for an incredibly simple binding–without one scary word included. And, then, look what I found at the Dollar Tree–exactly the elastic cord I needed. And, of course, for only one dollar.

Handcrafted Journal

Five Easy Steps for a Lovely Journal:

#1

First, print double-sided these Lined Journal Pages. [I print six or seven for each journal–that equals 12 (or 14) pages with 24 (28) sides.] Be sure that when you print the second side you have put the sheets in the printer correctly so that it will print out the same as the front side.

Lined Journal Pages

#2

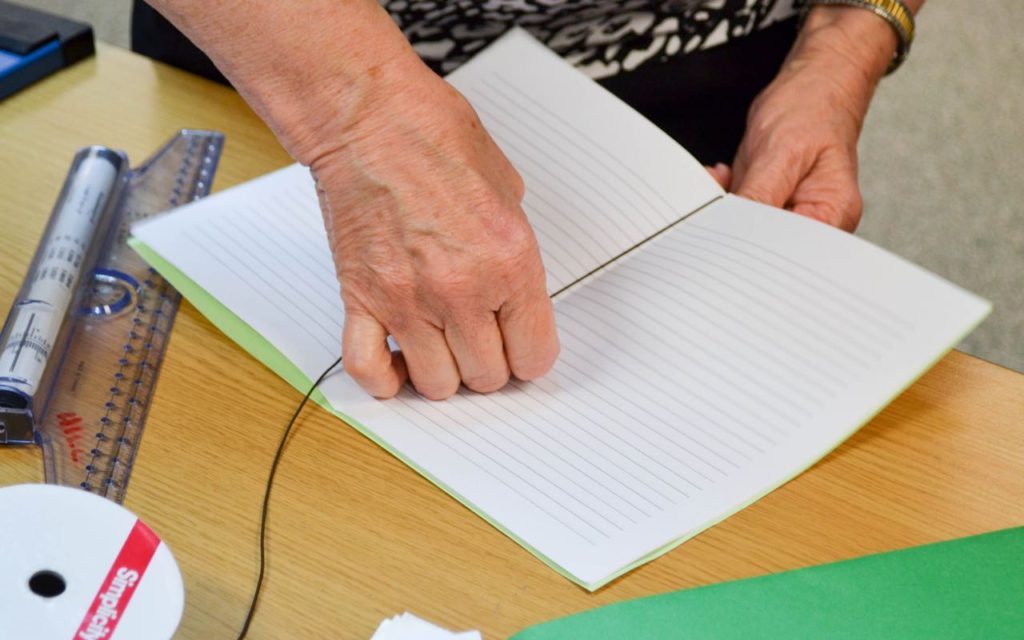
For the cover, fold in half a sheet of decorative 8 1/2 x 11″ heavy paper or cardstock. Then fold the sheets of lined paper in half and flatten the folded edge. Place the lined paper inside the cover.
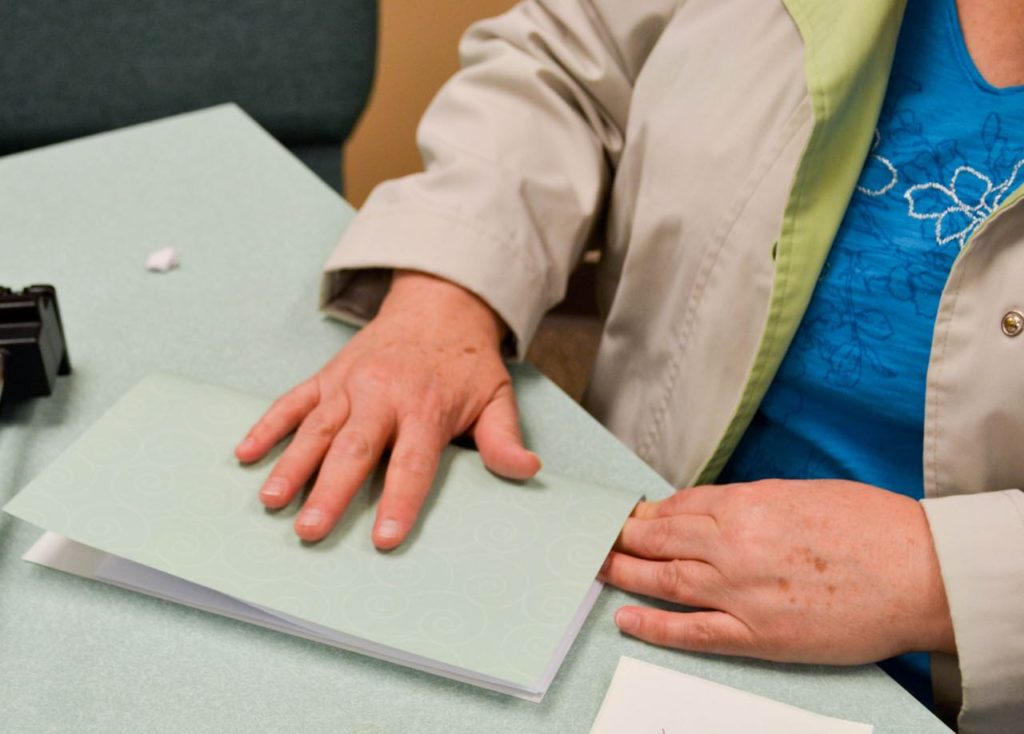
BB Journal - 07

#3

Here’s where my inspiration comes into play.

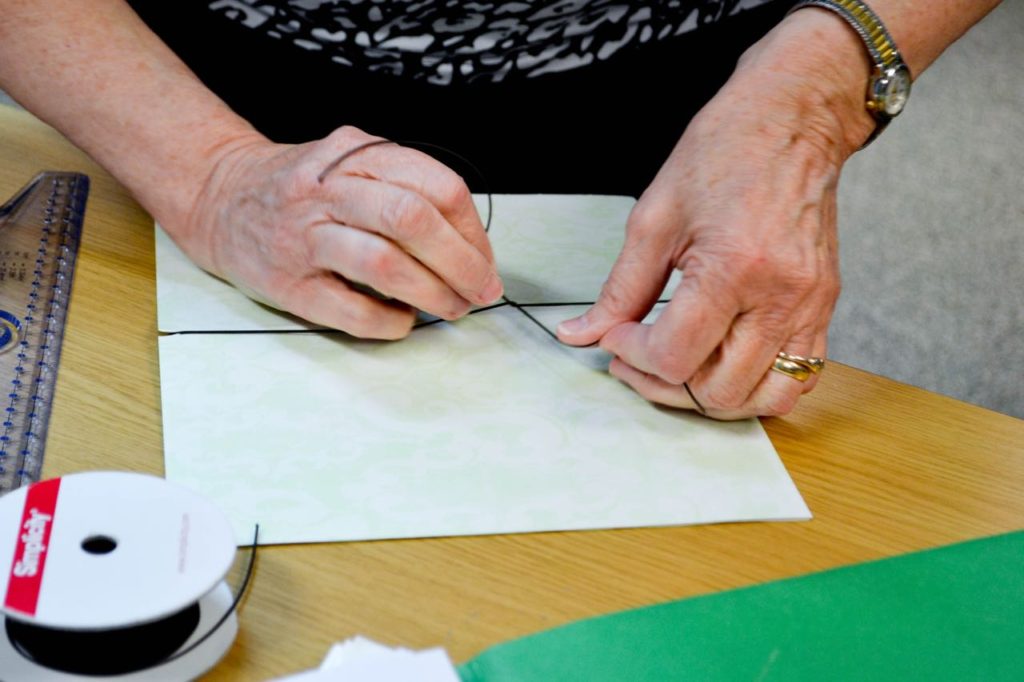
To create an it-couldn’t-be-easier binding, use scissors to snip two tiny cuts in the fold–one at the top of the page and one at the bottom. (See slideshow tutorial below.)  Then cut a length of the elastic, slip it through the two snips and wrap it around the journal.

DIY Journal

#4

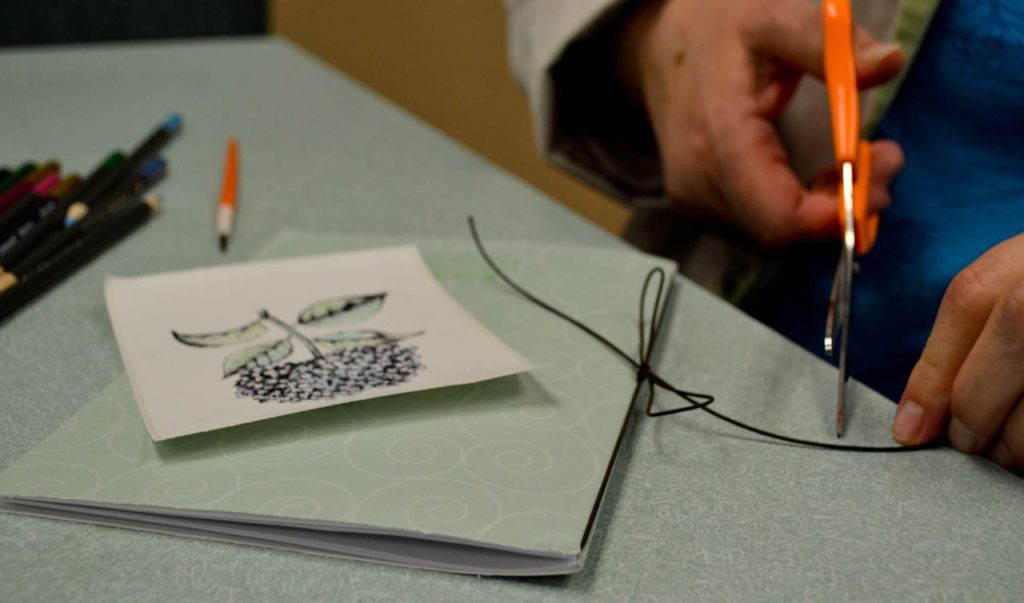
Finally tie the elastic in a bow and double-knot.

BB Journal - 02

How easy is that?!

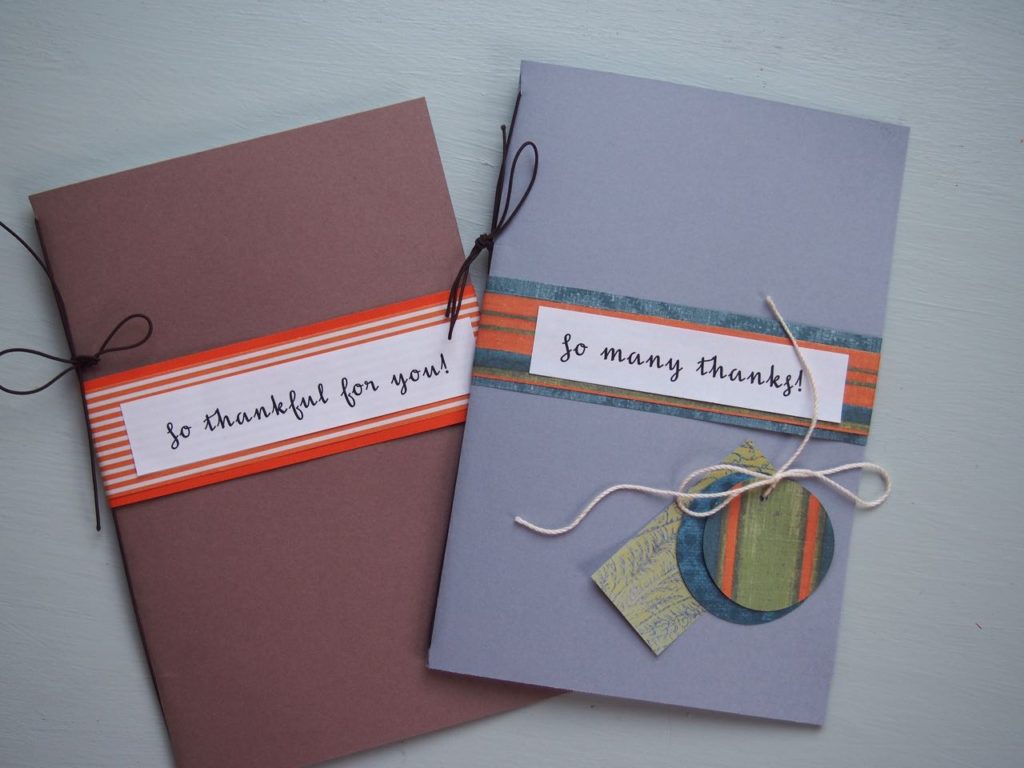
My crafting friends also used rubber stamps, painted them with water colors, and adhered them on a plain cardstock cover.

BB Journal - 09

#5

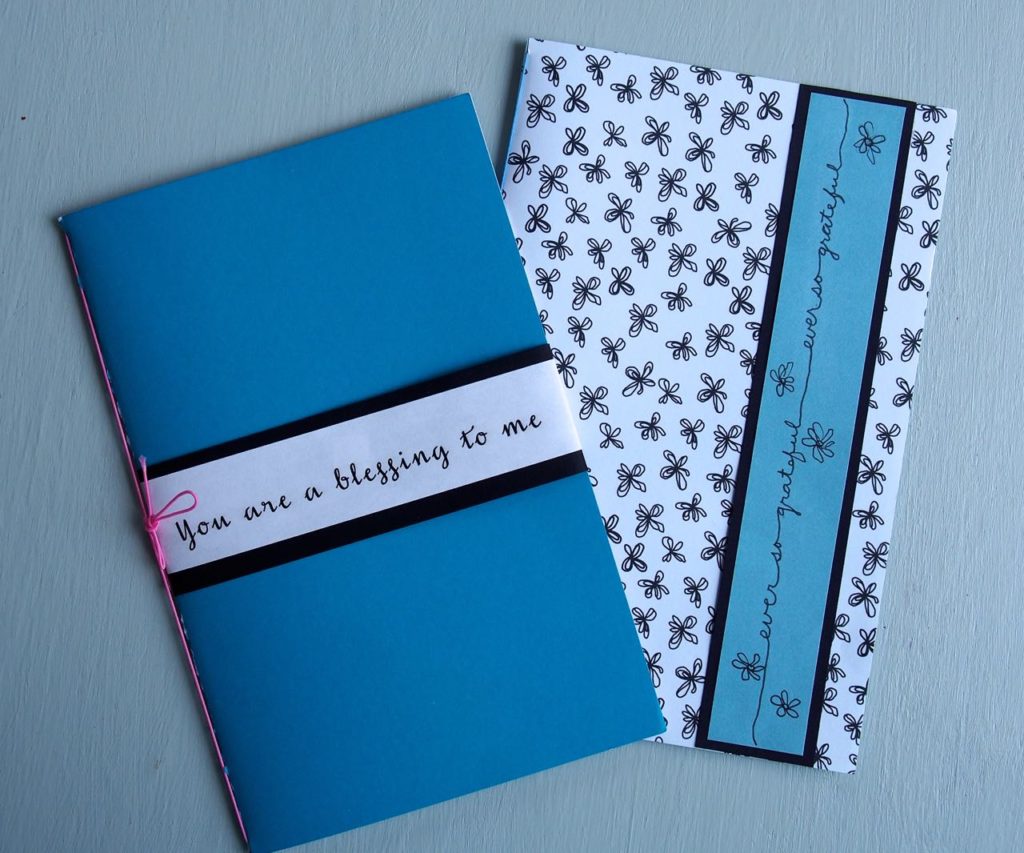
If you want to add a belly band for a final touch of spice, print a selection of thank you sayings. Trim the saying of your choice, mat it with a wider strip of 12×12′ colored paper, wrap it around the journal over the elastic binding, and adhere the two ends. [Don’t adhere the belly band to the back of the journal because it will tear the journal when it is ripped off.] Or use your own handwriting to express your warm thoughts. The easy steps are explained in the slideshow tutorial at the end of the post.

Belly Bands

One of the beauties of this gift project is that several can be created at one time–and ever so quickly. And they can be sent in the mail–ever so easily.

Handcrafted Journal
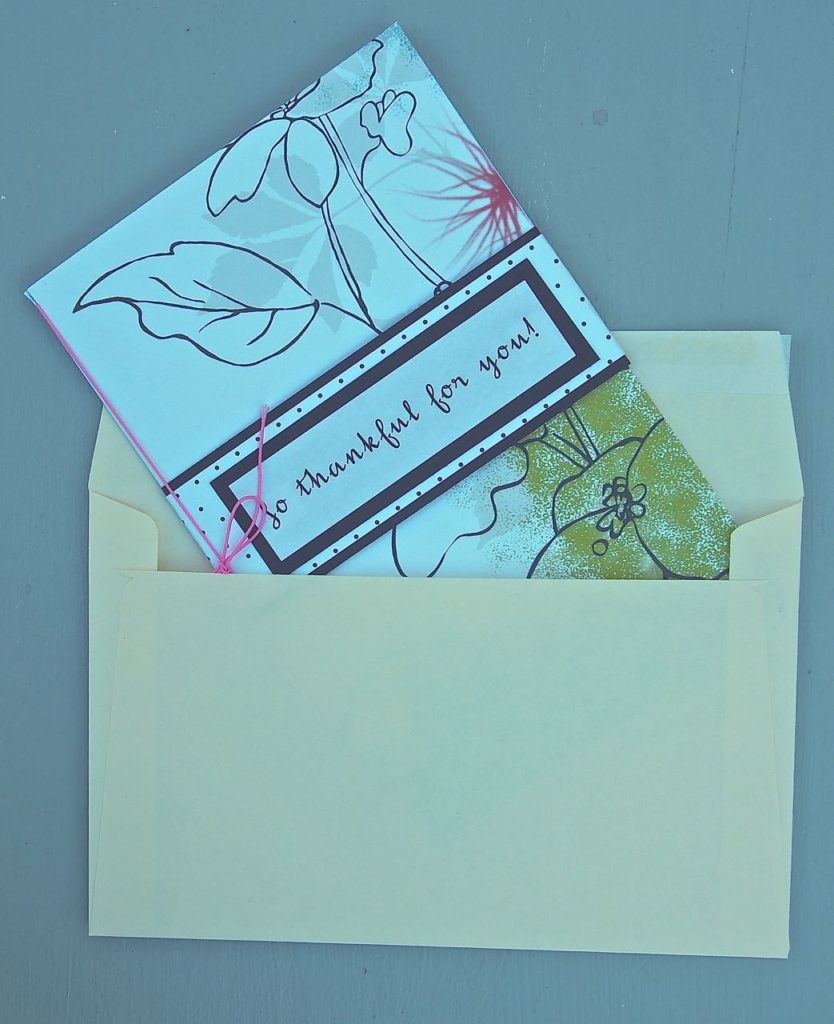
Some of the people I want to bless are not local, so I like to send journals in the mail. I discovered that 6 folded sheets of paper fit comfortably in an A9 envelope (5 3/4 x 8 3/4″) ] and mail with two first-class stamps.

Wouldn’t you like to find a journal like this in your mailbox?

Enjoy the following 2.5 minute tutorial.

Click to play this Smilebox slideshow

***

For those of you who haven’t met her, the Dollar Store Diva happens to be my Mom who has a special power.  She can transform Dollar Store and other inexpensive finds into super fun gifts and crafts that would brighten anyone’s day! Check out more from her here. 

Filed Under: Craft Ideas, Giving Tagged With: Dollar Store Diva, noads

The Dollar Store Diva: My Personal Story of Finding a Creative Way to Say Thank You

November 3rd, 2016 By Kaley
This post may contain affiliate links, which means I will make a small commission if you click and make a purchase.

Handmade Journal


Note from Kaley: I am honored to have my Mom share a little bit of her personal story with us today on the blog. Each time I hear this particularly touching story from her childhood, I am moved to tears by this simple act of compassion. May we all remember those who have touched our lives in such simple and meaningful ways during this season of Gratitude.

                      “Feeling gratitude and not expressing it is like wrapping a present and not giving it.”

**********

My third-grade picture that my dad carried in his wallet.

The year was 1957 and the grass was just starting to grow over my father’s grave. With the stop of my father’s heartbeat, my mother had been thrust violently into the role of breadwinner, and during that summer of my tenth year, she sat at a desk miles away from home working on a teaching degree. For those six weeks, my two teenaged sisters were left to care for my younger sister and me. In their bobby socks and ponytails, they spent their summer feeding us from cupboards that were too often bare, hanging our clothes on the line to dry, and keeping us safe at night.

In the afternoon of the day of my memory, I was taken to the doctor’s office with a dangerously infected toenail. Dr. Barrall bent his head, with its blazing red hair, over my foot, injected a shot of Novocain into my big toe, and proceeded to rip off the nail. My screams shot down the hallway and filled the waiting room.

That evening I lay alone in my rumpled bed. There were no pictures on the walls of my bedroom; there were no curtains at the window to sway in the breeze. This was the house we had escaped to after our house on Main Street had been taken away from us, after my father had sat down in the living room chair and died.

With my leg stretched out in front of me, I watched the stain of red seeping through the fat wad of gauze around my toe. The aching pain moved up my leg, and I sobbed. I had no mother; I had no father. I felt so very alone, in a house on the edge of town, with no pictures on the walls and no curtains at the window.

My sisters’ friend Flossie had stopped by the house, and the three girls were whispering nervously in another room. They should have been giggling together, like teenagers do on hot July evenings, but instead they were responsible for a wailing, inconsolable child.

Quietly, Flossie stepped into my room carrying a pan of cool water and a washcloth. She sat down on the edge of my bed and placed the pan on the nightstand. As she reached into the pan to saturate the cloth, she started cooing soft and soothing words.

I can still see her hands—dipping the cloth in the pan, wringing out the water, wiping my face, my damp forehead, my swollen eyes. Her hands—dipping the cloth in the water, wringing it out, wiping my face, my forehead, my eyes. Making soft, soothing sounds.

My sobs stopped, my body relaxed, and now it was just the murmuring of Flossie’s voice, the swishing of the water, the cool cloth to my face.

A gentle grace-filled quiet entered the room—and I slept.

*****

My two older sisters fishing with Dad a couple of years before he died. I love everything about this picture.

*****

Though I hadn’t seen Flossie for decades, I located her so I could say thank you. She was stunned–she had absolutely no memory of that July evening.  And I was amazed that for all these years she had been unaware that she had  wiped away the tears of a desolate little girl. I started thinking of other people who had shown kindness to me over the years. Like Flossie, perhaps they, too, had no memory of the gift they had given me. I wanted to thank them.

Recently, some friends and I decided to spend a few Wednesday evenings together creating small gifts with the specific purpose of  blessing others. And what fun we had laughing and working together, all of us with a desire to bless or say thank you.

Handmade Journals

Click here for a tutorial for these super-easy journals along with a free printable.

*****

For those of you who haven’t met her, the Dollar Store Diva happens to be my Mom who has a special power.  She can transform Dollar Store and other inexpensive finds into super fun gifts and crafts that would brighten anyone’s day! Check out more from her here. 

Filed Under: Craft Ideas, Giving Tagged With: Dollar Store Diva, noads

How to Make A Cup of Coffee That’s Perfect for You

July 26th, 2016 By Kaley
This post may contain affiliate links, which means I will make a small commission if you click and make a purchase.

Coffee Save Cash

I finally managed to make the transition from tea to coffee when I turned 45. Unfortunately an expensive addiction to Dunkin’ Donuts coffee quickly followed. I made many attempts to make coffee at home that I would like as much as the coffee I bought at the drive-up window, but success eluded me.

That is, until I read Heidi’s too easy iced coffee post. I loved the idea, but it still wasn’t quite right for me. At the end of her post she suggested that we could adapt her recipe to fit our personal preferences. Aha! I knew that was exactly what I needed to do.

I realized that the reason I like Dunkin’ Donuts and Starbucks coffee is that they follow a recipe; they make it the same way every time. Not me. I used different brands of coffee [whatever was on sale]; I poured in random amounts of random flavors of coffee creamer. I never knew quite how it was going to taste. So, following Heidi’s sweetened condensed milk idea, I experimented until I had created a recipe that fit my coffee preferences.

So, if you are like me and want your Dunkin’ Donuts coffee to be an occasional treat and not an addiction, I suggest that you follow these simple steps to help you find just the right recipe for your home-brewed coffee:

#1 Find the brand of coffee you like

First, per my coffee-connoisseur-daughter’s suggestion, I found a brand of coffee that I like.

Coffee Creamer Recipe

#2 Discover the preferred strength of your coffee

Most coffee manufacturers suggest that one tablespoon of coffee grounds should be added to each 6 fl ounces of water for a regular cup or two tablespoons for a stronger brew. I soon realized that, because of my love-affair with creamer, my preference is even a bit stronger. I figured out the amount of grounds I like, and I now consistently pour that amount into the filter before I hit the brew button.

#3 Determine your preferred creamer and preferred amount

I’m definitely a sweet-creamer lover. I wanted to have a homemade creamer, so I played around a bit until I came up with this just-right-for-me Vanilla Creamer Recipe:

-one 14 oz. can of sweetened condensed milk

-one small carton of heavy cream

-two teaspoons of vanilla extract

I pour the can of sweetened condensed milk into a one-quart canning jar, then I refill the emptied condensed milk can with the same amount of heavy cream and pour that into the canning jar. For a final flavor-touch, I add two teaspoons of vanilla extract. I screw the lid on tightly and shake the jar vigorously.  It’s so much fun, and it looks so beautifully creamy in the glass jar.  [I note the expiration date on the cream and know that I can keep the vanilla creamer in the fridge until that end date.]

**To help you find your personal creamer preference, you can find more yummy recipes here.

#4 Now it’s time to create your exact measurements for your Perfect-for-You Coffee Recipe

After some experimenting, these are the measurements I came up with for my morning brew:

Nancy’s Very-Own-Perfect-for-Her Vanilla Coffee Recipe:

For a hot cup of coffee in my lovely mug, I measure 1/4 cup creamer into the mug, then I add 1 1/4 cups of steaming coffee. For the final touch I use my handy-dandy frother for some lovely foam.

Hot Frothy Coffee

For my iced coffee I actually use tall glasses that I bought at Dollar Deals. I pour the vanilla creamer up to the second black dot (or green line) from the bottom, then pour cold coffee (left over the the morning’s six cups) to the second dot (or line) from the top. Isn’t that fun?!

Iced Coffee

I whip the finished product with the frother, then add as many ice cubes as I can squeeze into the glass.

And just imagine the skip-the-stop-at-Starbucks cash I save!

Iced Coffee

So there you have it: a simple strategy to help you create a money-saving recipe for a perfect-for-you cup of coffee. Mmm–I think I’ll go make a cup right now.

Perfect Cup of Coffee

Care to join me?

***

For those of you who haven’t met her, the Dollar Store Diva happens to be my Mom who has a special power.  She can transform Dollar Store and other inexpensive finds into super fun gifts that would brighten anyone’s day!

Filed Under: Recipes Tagged With: Dollar Store Diva

The Dollar Store Diva: Celebratory Easter Printables

March 21st, 2016 By Kaley
This post may contain affiliate links, which means I will make a small commission if you click and make a purchase.

Easter Wall Art Printable

I love these Easter printables from our very own Dollar Store Diva! Such a simple and lovely way to commemorate the Easter holiday. I’m going to print mine out now!

***

As my children were growing, we had a traditional saying as Easter approached. Their dad would exclaim, “He is risen!” With equal zeal, we would all respond, “He is risen indeed!”

This year I created two printables– He is Risen Indeed –to keep these powerful Easter announcements in brilliant view in our home.

I trimmed the two printables, adhered them to sheets of colored paper, and slipped them into  8×10″ frames.

Easter Printables He is Risen

And there you have it–Easter printables to celebrate this blessed holiday.

Click here to print yours.

***

For those of you who haven’t met her, the Dollar Store Diva happens to be my Mom who has a special power.  She can transform Dollar Store and other inexpensive finds into super fun gifts that would brighten anyone’s day!

Filed Under: Merry Little Living, Simple Living Tagged With: Dollar Store Diva

A Perfect Grandparent Gift: Homemade Pie of the Month Club (with a Free Printable!)

January 30th, 2016 By Kaley
This post may contain affiliate links, which means I will make a small commission if you click and make a purchase.

Grandparents Pie of the Month Club

My husband’s parents have been such good grandparents to our now-adult children. Every Christmas or birthday or anniversary we want to give them a special gift.

Normally we get something for their home. At the moment they live in a small senior apartment, but in the near future they are contemplating moving into a granny flat on some land owned by a relative. Some friends of theirs from Australia recently moved into one of these affordable granny flats in Sydney so they have been tempted to find something similar to call their own. Granny flats are an excellent solution if any elderly relatives in your family live with mobility issues or simply need to downsize.

This year though we wanted to get something entirely different! One day last fall I got a sudden urge to bake an apple pie–it was, after-all, fall. When we took it out of the oven, Doug and I decided to visit Dad and Mom and share our bubbling treat with them. And, oh, the fun we had–sitting around the table laughing together between bites of sweet deliciousness.

OLYMPUS DIGITAL CAMERA

I shared this story with my family, and we decided that the perfect Christmas gift for Gr and Gr (as they are lovingly called) would be the gift of a “Pie of the Month Club.”

I created a card for them and, since most of our children aren’t local, I used the phrase “randomly throughout the year”. Gr and Gr keep the card on display in their apartment so that everyone who visits can see it. [Doesn’t that make you want to smile?]

Grandparent Gift Pie
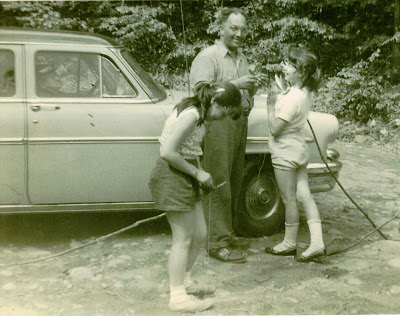
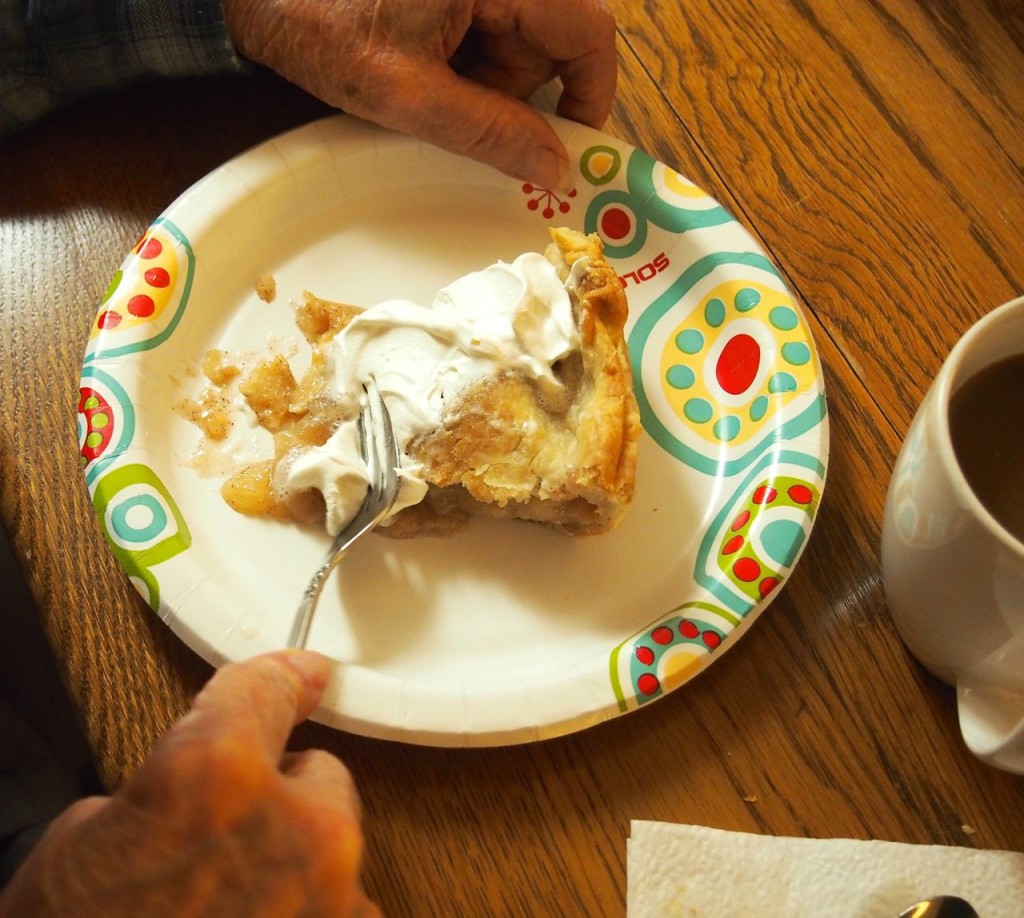
[Grandpa Doug savors his apple pie with fluffy whipped cream.]

Doug and I signed up for the first month. When we arrived with the still-warm-from-the-oven pie, there were smiles all around. And, of course, after we ate the pie, we watched “Wheel of Fortune” together. [You smiled again, didn’t you?]

Pie Grandparent Gift
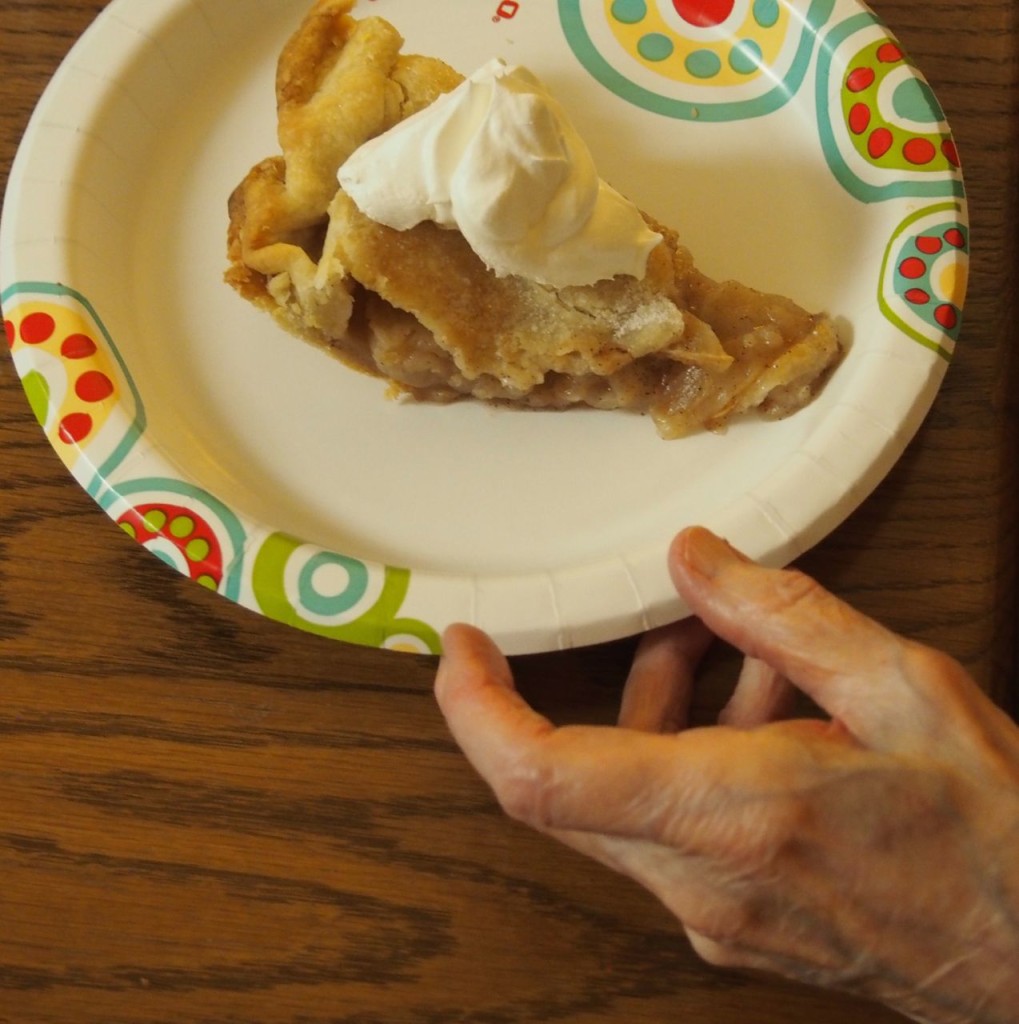
[I made the pie with Splenda so Grandma Jo could enjoy it too.]

Is there someone you’d like to bless throughout the year?

If so, I have created a printable for you that can be folded in half to make a card. [I used tan card stock and then trimmed it to the size I wanted.] You can personalize the card with your own whatever-the-occasion message inside.

Grandparent Gift Pie

Printable: Pie of the Month Club

Pie of the Month Club

And there you have it–whether it be pie of the month, dessert of the month or soup of the month–such a perfect gift for someone you love.

***

For those of you who haven’t met her, the Dollar Store Diva happens to be my Mom who has a special power. She can transform Dollar Store and other inexpensive finds into super fun gifts that would brighten anyone’s day! Check out more of her fun ideas here.

Filed Under: Giving Tagged With: Dollar Store Diva

5 Super-Fun Christmas Doodles Gift-Wrap Ideas

November 27th, 2015 By Kaley
This post may contain affiliate links, which means I will make a small commission if you click and make a purchase.

Christmas Doodles Gift Wrap

Idea #1 Joy to the World

In a recent Christmas post, I explained that I had been motivated by The Merry Little Christmas Project to simplify Christmas 2015.

For me, Christmas offers a season of creative outlet, so I knew I would have to simplify my December-long crafting mania. So instead of–per usual–attempting to make each wrapped gift a work of art, I decided to wrap all my gifts in kraft paper or brown paper bags. But here comes the fun part: even though I don’t have a speck of artistic ability, I would decorate them with quick  and easy Christmas doodles.

And what fun I’ve had.

Gift Wrap Christmas Doodles Idea #2  Merry Christmas colored-pencil sketch on a lunch bag

  My daughter, son-in-law, and their six oh-how-I-miss-them children live in Kansas–many hundreds of miles away from our New York home. Each year my daughter shops for me on Amazon; I then place the order (using my Prime free shipping) and have the gifts sent directly to their Kansas address. A great idea, but I have always felt a bit sad that I don’t get to wrap the gifts.

This year I decided to create the wrapping paper at home using paper bags so Desiree could just slip the gifts into the bags along with some tissue paper, attach the decorative sketch, and there it is–a personal touch from Grandma.

Since the bags are flat it is easy to send them via USPS.

Gift Wrap Christmas DoodlesIdea #3 For this sketch I used colored pencils and drew right on the bag.

DIY Christmas Wrap DanglesIdea #4 I sketched these stars onto a grocery bag.

Christmas Doodles NativityIdea #5 I love the simplicity of this nativity; I made a tag to adorn the simple Dollar Store kraft-paper wrapping.

Christmas Doodles NativityAnd the quiet simplicity of this sketch is almost breath-taking.

I also sketched it directly on a grocery bag. No artistic skill required, just lots of love.

Christmas Doodles Gift Wrap

Bit by bit I have made an assortment of doodled paper bags to have ready to grab for last-minute gifts. [Flat bags take up so little space.]

So there you have it: five super-fun Christmas Doodles gift-wrap ideas!

And in the words of beloved Tiny Tim: May God bless us one and all!

***

Want to join us on our mission to choose the LESS instead of the STRESS this Christmas season? You can grab your own copy of The Merry Little Christmas Project here.

Merry-Little-Christmas-Project-335x500-6

***

dollar--store-diva-Christmas

For those of you who haven’t met her, the Dollar Store Diva happens to be my Mom who has a special power.  She can transform Dollar Store and other inexpensive finds into super fun gifts and crafts that would brighten anyone’s day!

Filed Under: Craft Ideas, Giving, Merry Little Christmas Tagged With: Christmas Deals 2015, Dollar Store Diva

Super Simple Gift Wrap Ideas with Christmas Doodles

November 17th, 2015 By Kaley
This post may contain affiliate links, which means I will make a small commission if you click and make a purchase.

Gift Wrap Christmas Doodles

Ever since I devoured  Kaley’s book, The Merry Little Christmas Project, I have been on a mission to simplify Christmas 2015. However, in my quest for simplicity, a giant-sized issue stands in my way: Creative is my middle name.

But wait! I have developed a strategy that will address both issues–the creative juices that wake me up in the morning and my deep desire to SIMPLIFY.

My most recent passion has been…doodling. Honest. [And this is the woman who has always said, “The only two things I can draw is a smiley face and a cloud.”]
That’s it!  Doodling! Instead of bows and ribbons, I am using simple, colorful doodles to decorate my packages!

Along with a pair of scissors and some scraps of  colored paper or card stock, these are the only tools I have needed:

Christmas Wrapping

Sakura Gelly Roll Pens

Circle Template

White Gel Pens

So here we go–my 2015 Creativity + Simplicity Wrapping Strategy:

1)

To simplify:  I will wrap all gifts in Dollar Store brown kraft paper or brown paper bags.

Christmas Bulbs Sketch

2)

To simplify: I will decorate the packages with something I find relaxing and enjoyable; for this Christmas that is doodling and sketching.

Watercolor Christmas BulbsI never dreamed I could do this! And so much fun.

3)

To simplify: Once I practice a sketch design, I will create an “assembly line” and create several of the same kind. The time spent in creating the original sketch will allow me to quickly produce others.

Christmas Wrapping Bulbs

4)

To simplify: I will use The Merry Little Christmas Project’s 20-Minute Missions. Once I practice the first one, I will set the timer, start my assembly line, and whip up several more.

5)

To simplify:  I will not wait until the last minute to frantically gather my paper and pens; I will light a candle, turn on some Christmas music and do it in November.

Christmas Snowman

The doodle decoration can double as the gift tag.

Christmas Wrapping

Because these are just flat pieces of paper, I have a pile of them ready to go so I can grab one when I have a package to wrap. It can be attached to a wrapped package or a brown bag. It doesn’t get much easier than that.

Christmas Wrapping SnowmanSnowman

So there you have it: creative simplicity at its best.

***

Want to join us on our mission to choose the LESS instead of the STRESS this Christmas season? You can grab your own copy of The Merry Little Christmas Project here.

Merry-Little-Christmas-Project-335x500-6

***

dollar--store-diva-Christmas

For those of you who haven’t met her, the Dollar Store Diva happens to be my Mom who has a special power.  She can transform Dollar Store and other inexpensive finds into super fun gifts and crafts that would brighten anyone’s day!

Filed Under: Craft Ideas, Giving Tagged With: Dollar Store Diva

The Dollar Store Diva: DIY Autumn Lights Garland

October 26th, 2015 By Kaley
This post may contain affiliate links, which means I will make a small commission if you click and make a purchase.

DIY Autumn Lights

 My favorite fall project from last year was this “Blessings Galore!” burlap wreath:

DIY Autumn Burlap Wreath

As I unpacked the wreath this year, I realized that I had plenty of autumn-y scraps of fabric and burlap left over. So I set to work, and look what I did in just one evening:

DIY Burlap Autumn Lights
-1-

I didn’t need to spend a dime on this happy project, and I suspect that if you dig deep into your craft bin, you’ll be surprised at what autumn-garland goodies you might find.

DIY Autumn Lights

-2-

I opened a Christmas bin to find a short strand of mini-lights.

DIY Autumn Lights

-3-

The beauty of a project like this is that perfection is discouraged; I like the random and chaotic feel of this garland. I ripped the fabric into strips about one inch wide and nine-ten inches long, and I didn’t worry for a minute whether or not the burlap was cut straight.

DIY Autumn Burlap Lights

And there you have it–a lovely mantel display that will bring beauty to your home throughout the fall season.

DIY Burlap Autumn Lights

By the way–the cute-little Pumpkin Box tutorial can be found here.

***

dollar-store-diva

For those of you who haven’t met her, the Dollar Store Diva happens to be my Mom who has a special power.  She can transform Dollar Store and other inexpensive finds into super fun gifts and decorations that would brighten anyone’s day!

Filed Under: Craft Ideas, Simple Living Tagged With: Dollar Store Diva

  • « Previous Page
  • 1
  • 2
  • 3
  • 4
  • …
  • 16
  • Next Page »

Welcome

About
Contact

My  name is Kaley. Wife, Mama, and Dreamer, I have a passion for saving money, living simply, and helping others find creative ways to live large on a limited budget.

My Favorite Things

Copyright © 2025 Kaley Ehret · Site Design by Sharon Hujik · Log in
Disclaimer | Disclosure Policy | Privacy Statement